3DMeasure |
Plugin for Revit
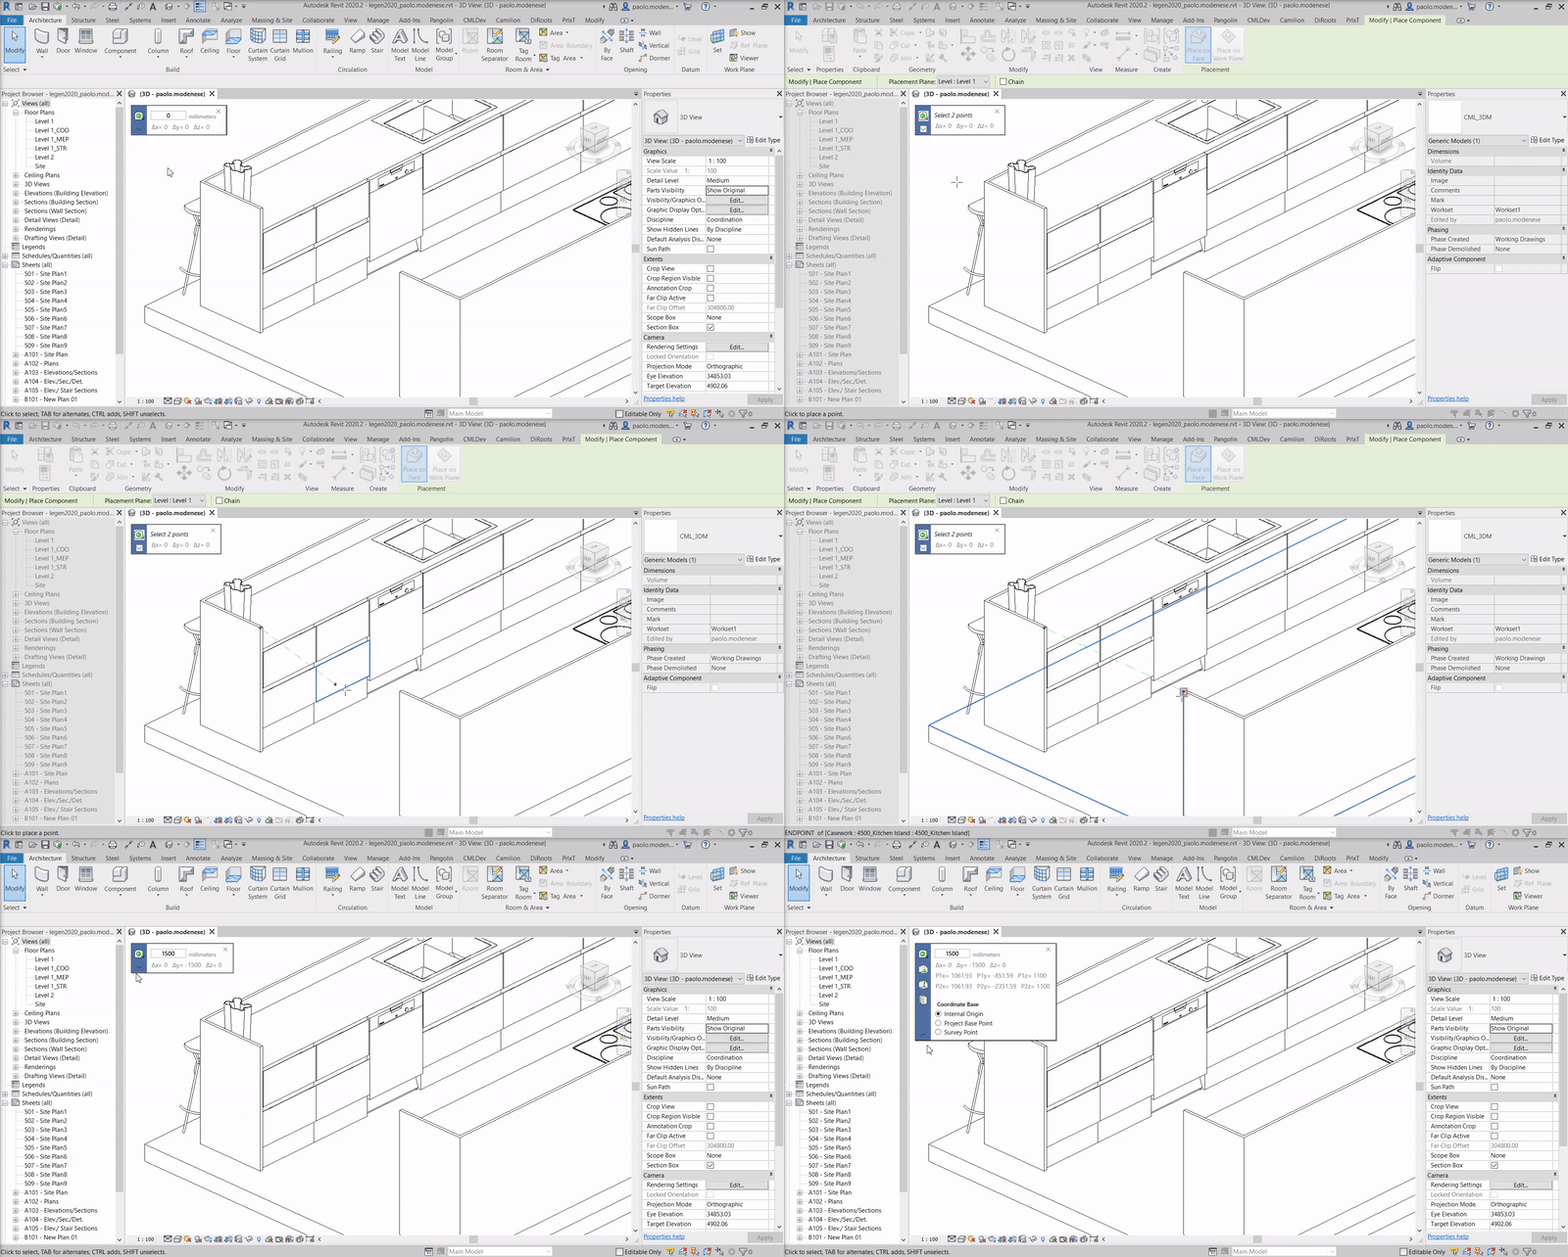
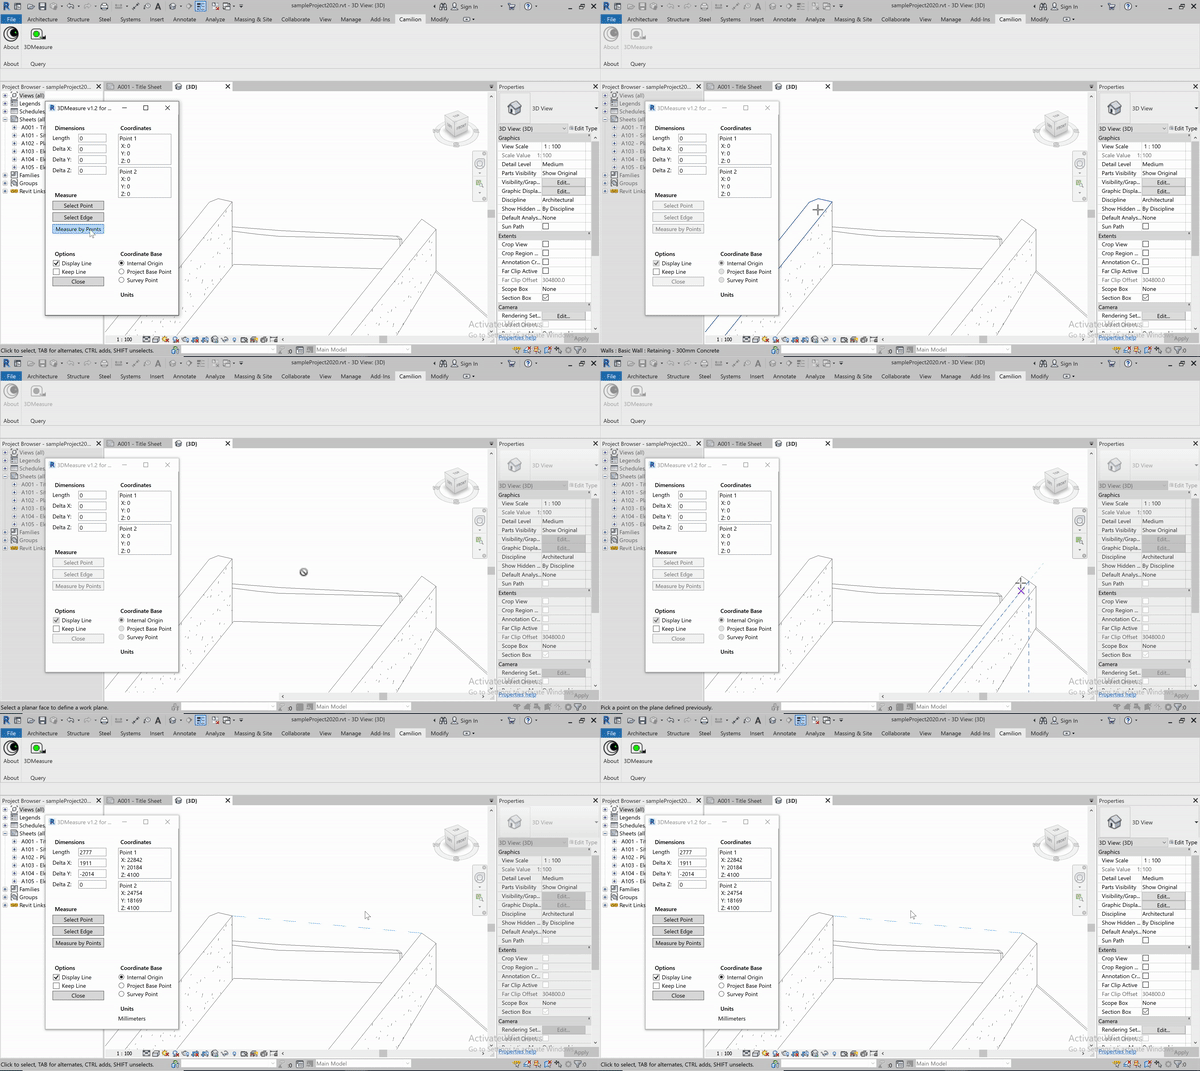
3DMeasure is a plugin that allows measuring any object in a 3D View by selecting 2 points or clicking on an edge.
Free Plugin

3DMeasure’s main functions

This plugin is for free!
Do you need a customised solution?
Lorem ipsum dolor sit amet, consectetur adipiscing elit vivamus in lectus. Praesent eget efficitur tortor. Lorem ipsum.
How to use 3DMeasure
Other products that work with 3DMeasure
Save more than 90% of the time with 3DMeasure
Unlock a world of efficiency with Camilion and Save time. Click to revolutionize your workflow now!
Documentation
What is 3DMeasure, a Revit Plugin for 3D measurement
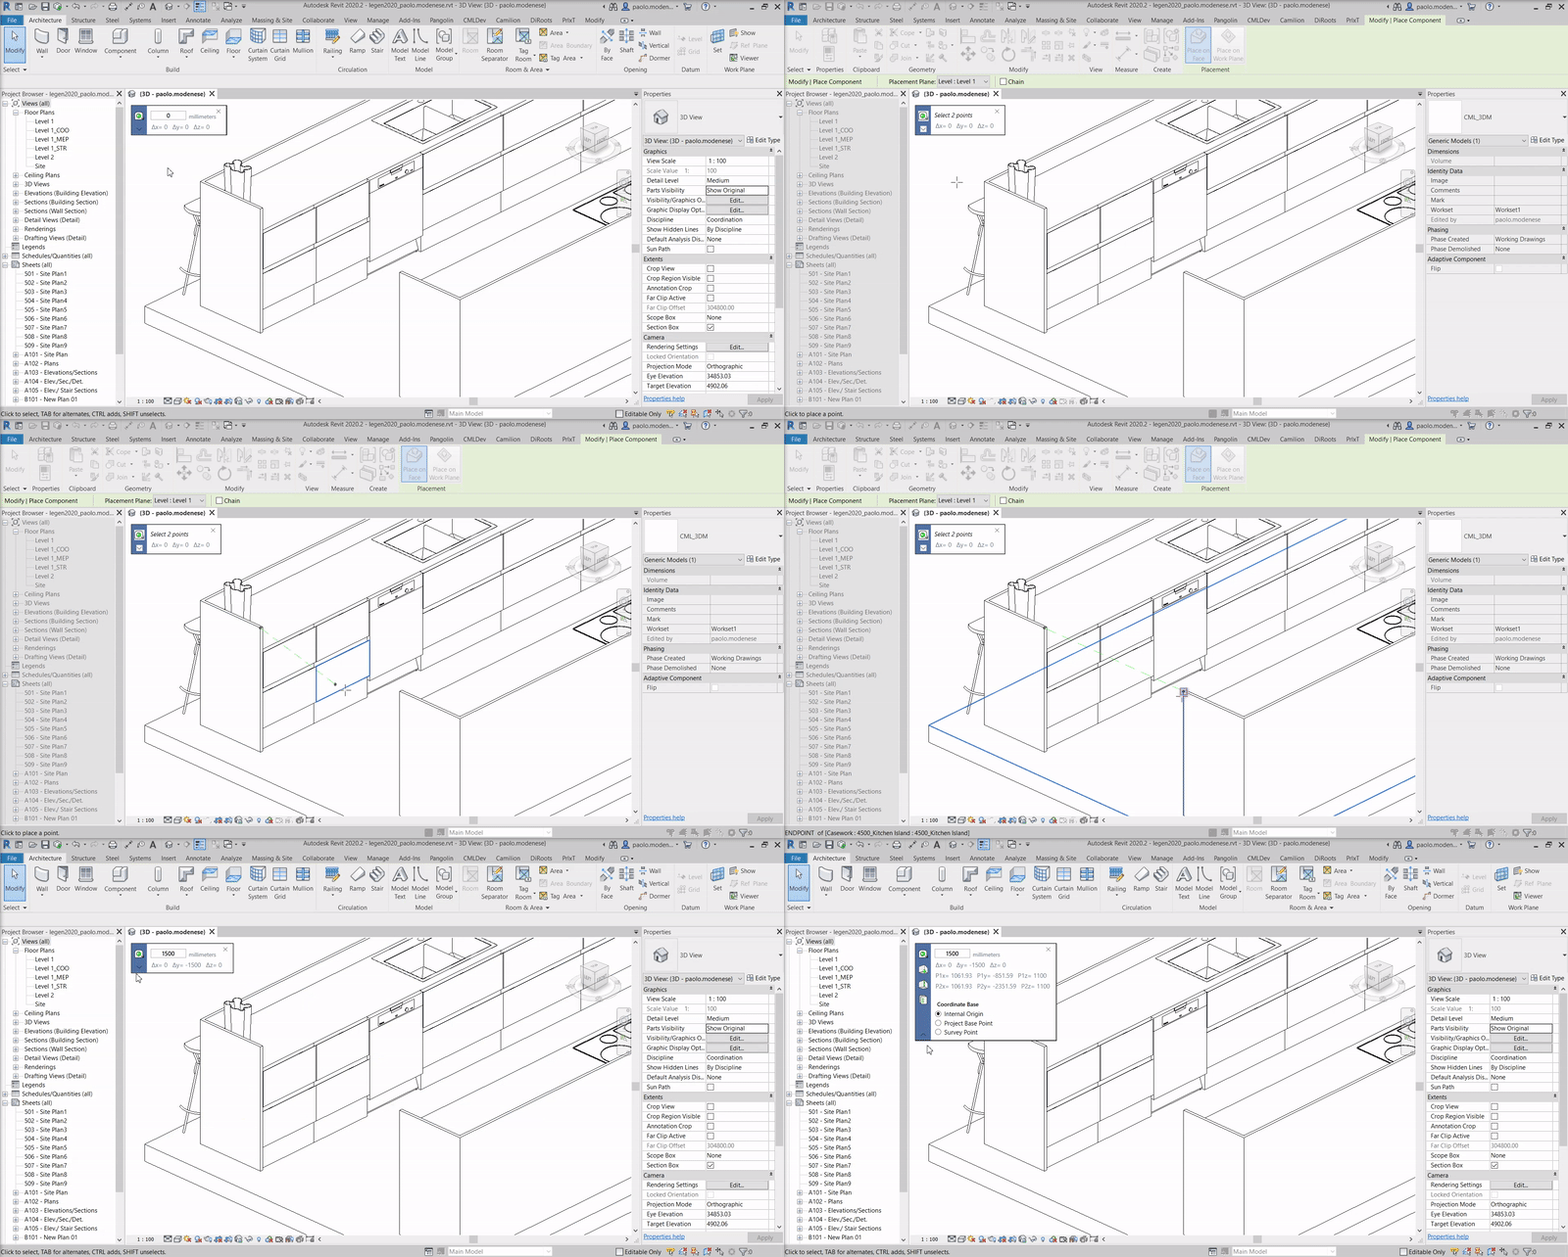
The 3DMeasure tool is a plugin for Autodesk® Revit® which allows you to measure in a 3D view by selecting 2 points or an existing edge.
Starting the plugin
To start the plugin, simply click on the 3DMeasure button located in the Camilion tab.

A dialog box will appear and you will be prompted to select 2 points.
Tip: You can configure a keyboard shortcut such as 3D to start the plugin and take measurements instantly.
Modeless dialog
This plugin uses a modeless dialog, this means that you can keep the dialog box open and keep working on your revit model. If you close the dialog box, it will always appear in the last place you positioned it.
Pressing the down arrow expands the dialog to reveal more data and buttons.

The buttons (a)
Measure
The measure button allows measuring in any 3D view with 2 clicks. Distance, deltas and coordinates are updated.
Select Point
Allows you to select one point in the model. The coordinates of point 1 are updated.
Select Edge
Allows you to select any edge in the model. Distance, deltas and coordinates are updated.
Copy to Clipboard
Copies the data displayed in the dialog box to your clipboard. Simply press Ctrl + v to paste it where you wish.
The data
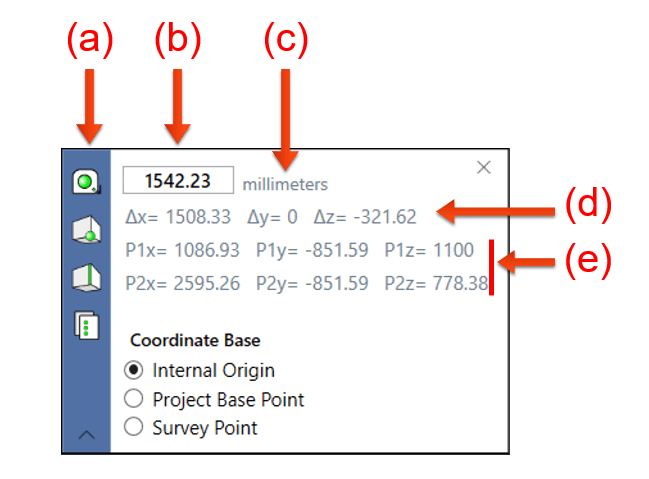
Distance (b)
The first textbox shows the length of the line being measured in project units
Units & rounding (c)
The units and rounding used are taken from the project units set in the revit file.
Tip: To see the project units, use the keyboard shortcut UN
Deltas (d)
The Delta (Δ) is the difference between the components of the first point minus the components of the second point. The units are in project units.
Δx: X of Point 1 minus X of Point 2
Δy: Y of Point 1 minus Y of Point 2
Δz: Z of Point 1 minus Z of Point 2
Coordinates (e)
The coordinates of both points are represented in project units and change depending on the coordinate base chosen.
Coordinate Base
At any moment you can switch betweeen the following coordinate bases:
Internal origin: The internal origin is the starting point for the internal coordinate system, which provides the basis for positioning all elements in the model.
Project Base Point: Defines the origin (0,0,0) of the project coordinate system.
Survey Point: Identifies a real-world location near the model, such as a corner of the project site or the intersection of 2 property lines.
The coordinates will update simultaneously.
Known issues
When selecting a point on a linked model, a few tab key presses may be required to snap correctly if the linked model’s origin does not coincide with the host’s model origin. This is currently a limitation of Revit’s positioning method.
Related content
Save more than 90% of the time with 3DMeasure
Unlock a world of efficiency with Camilion and Save time. Click to revolutionize your workflow now!


