PlotMan |
Plugin for AutoCAD
PlotMan Is a plugin for AutoCAD ® software to easily, quickly and intuitively bulk-generate PDFs from drafts.
From €50

PlotMan’s main functions

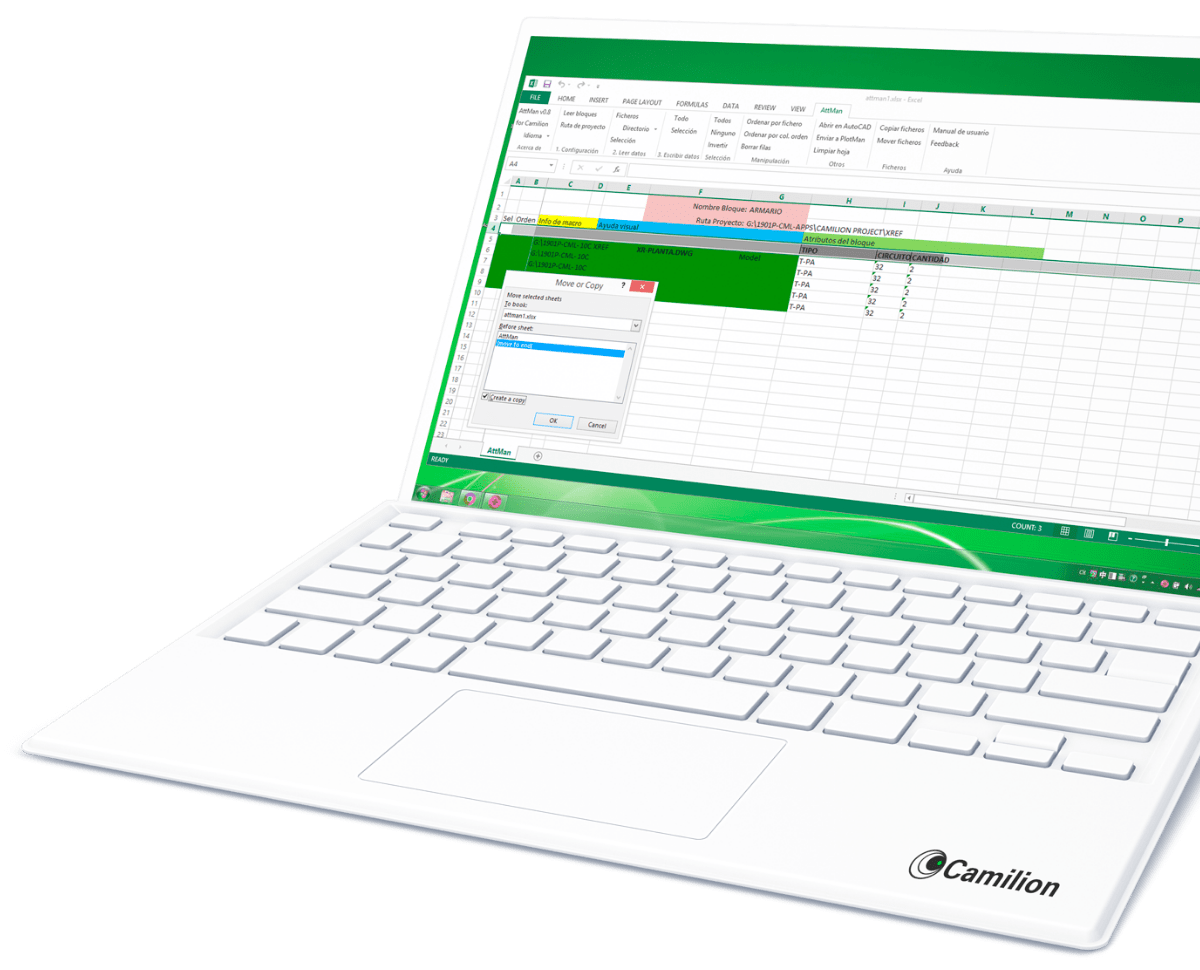
Set up your customised plan
Do you need a customised solution?
Count on us for a customised solution that perfectly fits your needs.
Save time with PlotMan: configure once, print effortlessly
System PlotMan
- Open any file (.dwg) and invoke the PlotMan command
- Upload the files to print and define
- Box block, pen type, file quality, whether a single PDF file or multiple, and paper size(s) for the PDF
- Click on print
Perform one action for ALL files
Traditional system
- Open the file to print
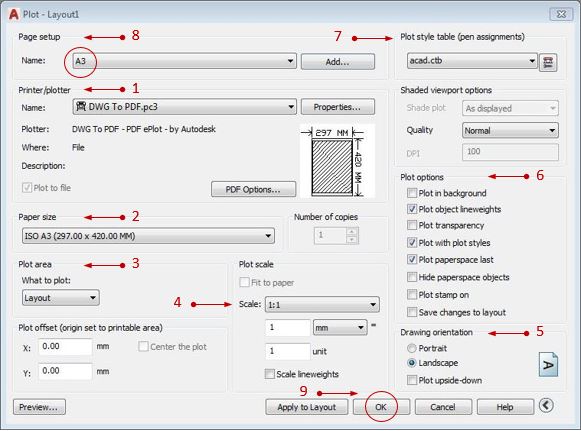
- Select Print and configure the print page, including paper size, orientation, and scale
- For multiple layouts with the same sheet size, repeat the configuration for each layout
- Confirm that all files to be printed share the same configuration if printing multiple layouts or from various files
- For different paper sizes, repeat the process for each required size
- Click OK
Gain time
How to use PlotMan
Other products that work with PlotMan
Save more than 90% of the time with PlotMan
Unlock a world of efficiency with Camilion and Save time. Click to revolutionize your workflow now!
Documentation
What is PlotMan, an AutoCAD Plugin for PDF creation
PlotMan is an Extension or Complement (English: Plug-in) for Autodesk® AutoCAD® software to facilitate mass PDF generation.
The printing philosophy of PlotMan is simple:
- Select block or block of the drawing frame reference that delimit a plane
- Select paper size, pens and PDF quality.
Compatibility
Currently, PlotMan is compatible with:
- Autodesk® AutoCAD® versions 2019 to 2026
Graphic interface
The PlotMan interface is as intuitive as possible to facilitate its use and configuration even in the most special cases.
Using PlotMan
To run PlotMan, you write plotman on the command line of AutoCAD It is necessary to have an open file.
The following window will open:
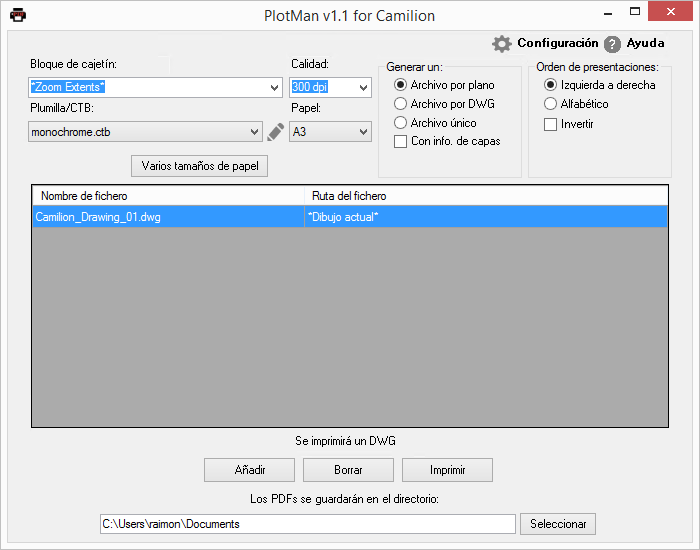
This window contains the most common options, as well as the Settings menu and option Various paper sizes which give way to less frequent configurations.
Basic use example
The usual use of PlotMan is:
- Add all the files we need
- Select block of the drawing frame (automatic if the block has already been used)
- Check the Pen
- Check PDF Quality
- Check Paper PDF creation format
- Check Output PDF File Type
- Check order of presentations
- Check the path where the PDFs will be saved
PlotMan remembers the latest options used.
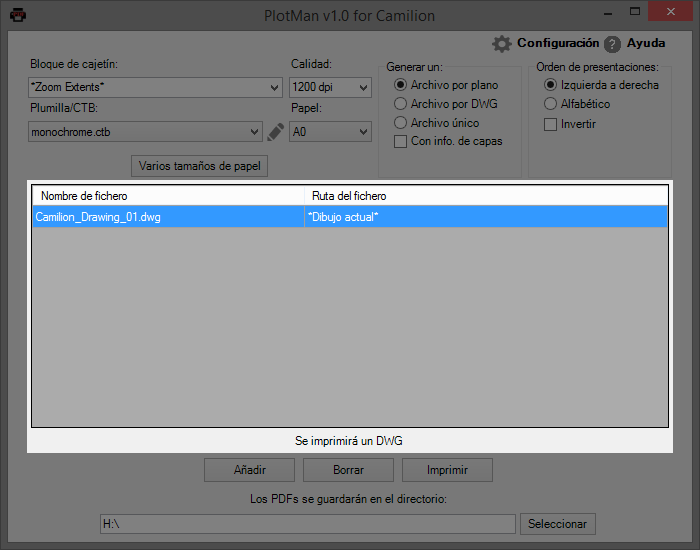
Central part
This central part of the window contains a table where the Uploaded files, one per row.
The columns in the table show the Name and the Path of each file.
- By clicking on the headings of each column, you can sort the files by this column.
- Drag rows allows you to reorder the files at will.
Under the central table, a text indicates how many files will be printed.
Add / Delete / Print / Select
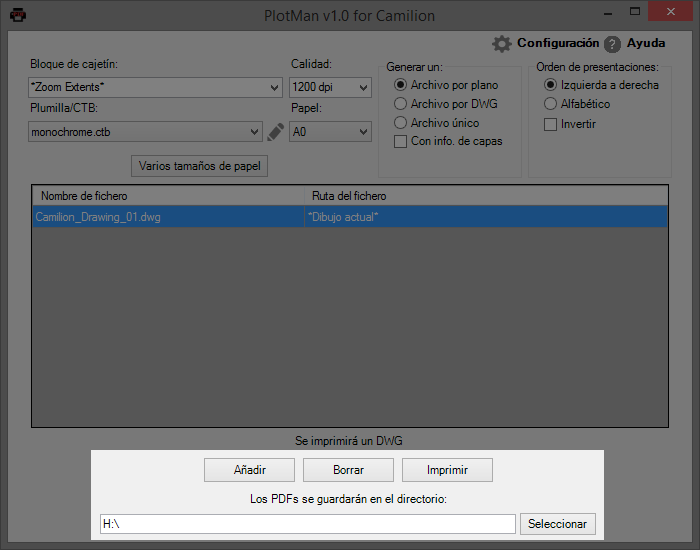
We have two ways to add the different assemblies we want to print:
- Dragging from the browser directly to the centre of the window.
- Using the Add button that will open the file selection.
- Multiple files can be selected using combinations CTRL + CLICK and SHIFT + CLICK .
- CTRL + CLICK adds the clicked row to the selection. SHIFT + CLICK Add all rows from the current one to the clicked row to the selection.
If we want to eliminate any of the added assemblies, we select the name from the file in the list and use the Delete button.
When we have finished configuring the entire application, we will use the Print button and PDFs will begin to be generated in the directory that we have included in Select.
Box block
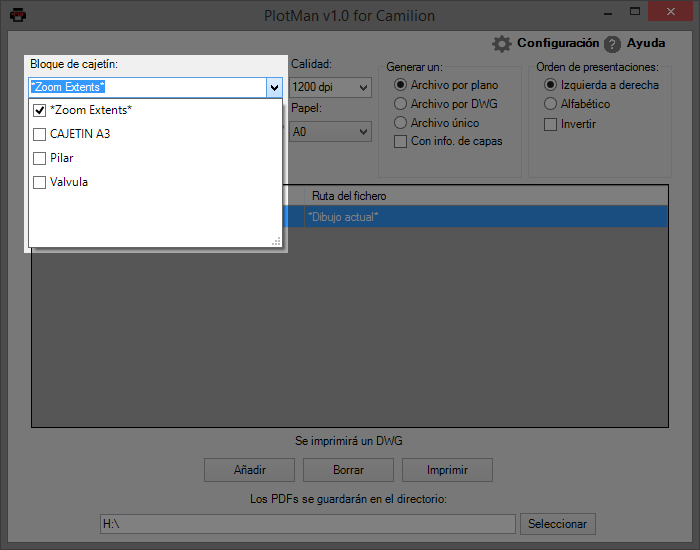
When adding the files in PlotMan , all the names of the files will be loaded External blocks and references in the drop-down menu, where we will select the box we need.
This drop-down menu allows you to select multiple blocks, allowing Print with different box formats at the same time.
- It is possible to manually write the name of the blocks (or copy and paste text).
- In the first PlotMan run, the blocks will be sorted alphabetically.
- In subsequent executions of PlotMan, the blocks we have used previously they will appear higher in the drop-down menu.
- In the drop-down menu it is possible to select *Zoom Extents* which instead of using blocks as a plane delimiter, prints the entire drawing area of all Presentations or Layouts in the DWG files.
Pen / CTB
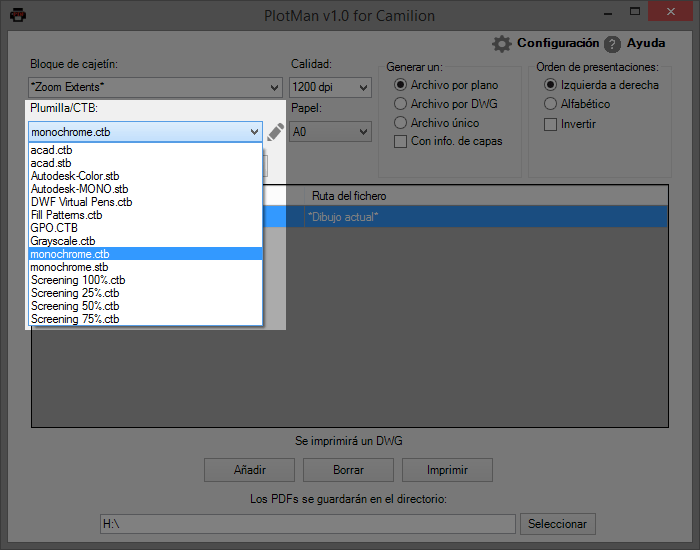
In this drop-down, the CTB (or STB) file that defines the nibs for the set of DWG files. By default monochrome.ctb is selected.
- Clicking on the pencil to the right of the drop-down opens a dialogue standard to edit the CTB or STB file.
- If we cannot find the CTB / STB in the drop-down, it must be added in the PlotStyles folder.
Quality
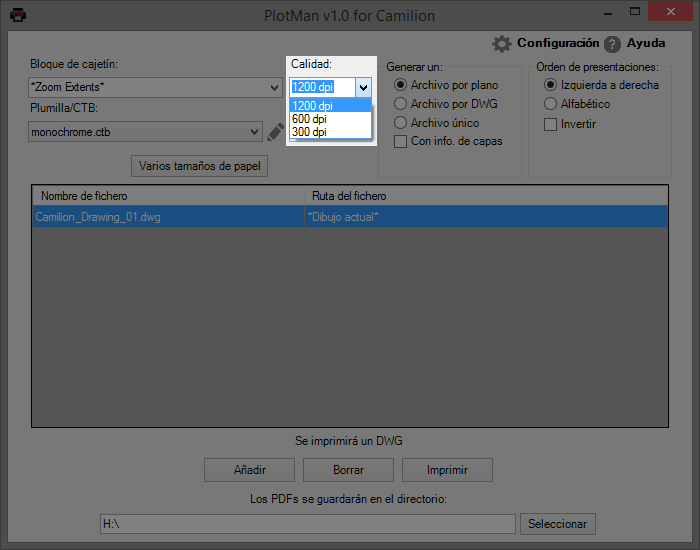
In this drop-down you can select the print quality of the PDF. It is possible to write any value, but it is recommended to use one of the values default: * 1200 dpi (high resolution) * 600 dpi (medium resolution) * 300 dpi (low resolution)
Paper
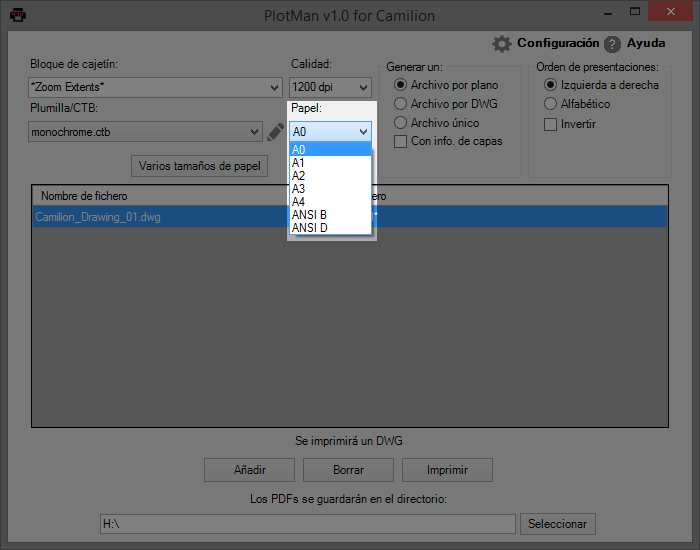
In this drop-down you select the paper size to which the printing area defined by the box.
The paper sizes that are set by default are: A0 ,A1 , A2 ,A3 , A4 ,ANSI B , ANSI D .
It is possible to use custom paper sizes. More information on this in Settings: Advanced view.
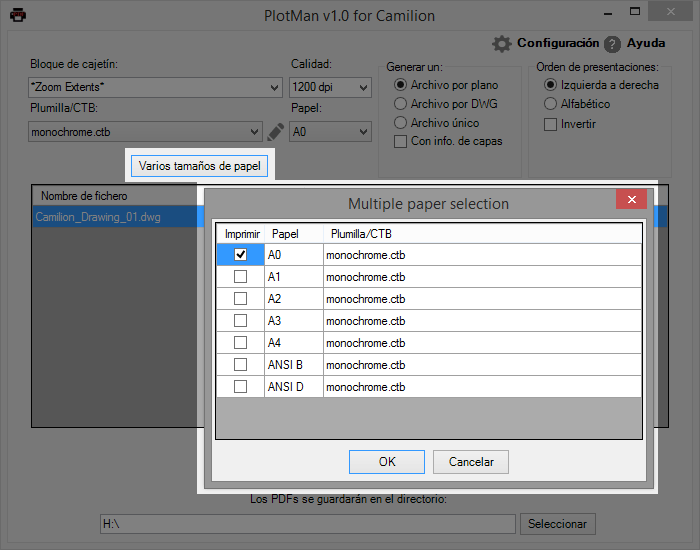
Various paper sizes
This option allows you to create multiple configurations of paper sizes and relate them to different pens / CTB.
Selecting various paper sizes will activate a screen that lets you will allow you to select different types of paper and that will generate a different PDF For each type of paper.
It also allows us to modify the Pen / CTB assigned for each type of paper.
- When using various paper sizes , the drop-down Pen / CTB and Paper will be deactivated and this window must be used.
- If there is a single paper size selected, the drop-down Pen / CTB and Paper are activated again.
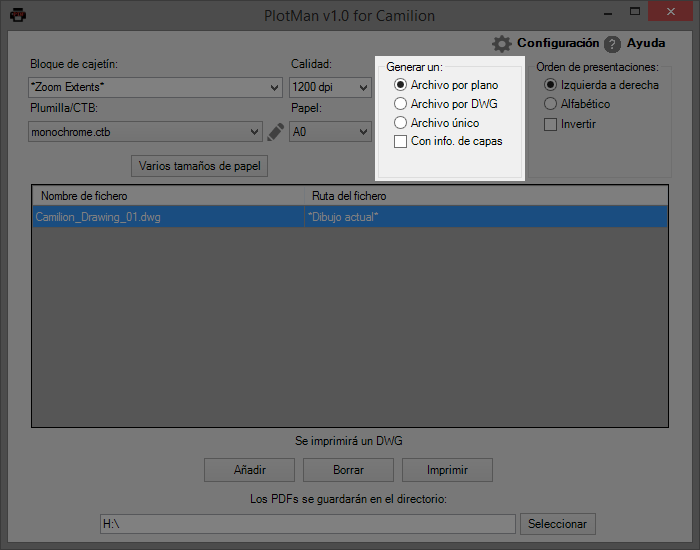
Generate a…
In this section we select the PDF format that we will generate:
- File per plan: The program will generate a PDF for each block or reference that it detects, is in the model space or in presentation.
If you print with *Zoom Extents* enabled, a PDF of the model space and one of each presentation or paper space.
- File by DWG: The program will generate a PDF of each file added With as many pages as presentations or blocks have the each file.
- Single file: The program generates a single PDF with so many pages as presentations or blocks have the different files. This PDF will have the following name plotman_project.pdf
This section also contains the box With info of layers that determines if the generated PDF will contain all the information of layers of the DWG.
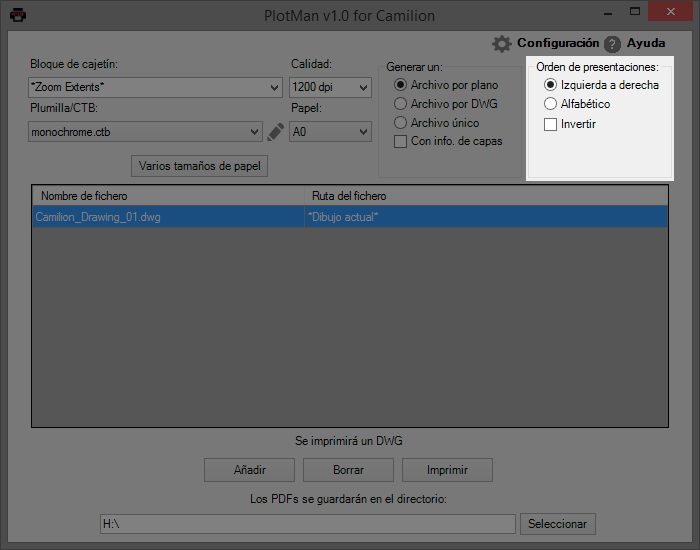
Order of presentations
In this section we select the print order of the presentations in PDF creation It is especially relevant in the modes File by DWG and Single file.
The options are:
- Left to right: Will print in the order of the tabs of presentation within AutoCAD.
- Alphabetical: Will print in alphabetical order of the name they contain the presentation tabs within AutoCAD.
This section also contains the Invert box that indicates whether the order chosen will be applied backwards.
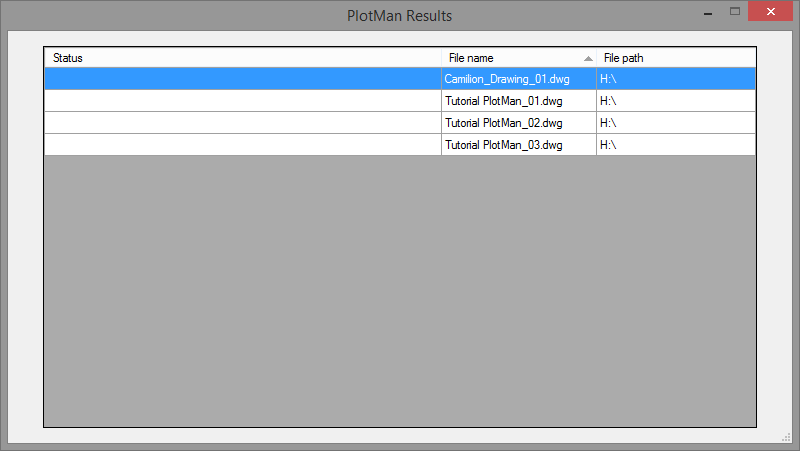
Results screen
Once the process of generating the PDF files is finished, a Results window PlotMan.
This window contains three columns with one row per file processed and the following columns:
- Status where if there has been an error it will indicate the type of error.
- File name and Directory are used to identify the file in question.
- If the Status column is empty, it means that everything went well with that file.
- If on the contrary there is some text, it will explain the type of error that occurred when printing the DWG file.
- One of these errors can be Box not found, which means, that No PDF was created for that DWG. This can happen if not all the blocks or references of a box or if a file was added that does not contain a plan, such as the case of an external reference.
- In the case of errors, a notebook with the routes is also opened and error messages.
- Error messages other than Box not found may involve an error in PlotMan.
- Sending the error message, together with the DWG file, can help fix the error in future versions.
PlotMan Advanced Settings
Advanced settings are powerful but are usually changed with little frequency. This is why they are under the menu Configuration marked with a gear.
The advanced options are:
| Advanced Option | Default Value |
|---|---|
| Advanced View | Off |
| Process Arabic Text | Off (*) |
| Transparencies | Activated |
| Line Thicknesses | Activated |
| Use Nibs | Activated |
| SHX in Comments | Activated |
| Language Options | As the system |
(*) Process Arabic text is automatically activated when text is detected Arabic in any of the processed files. More information in Process Arabic text.
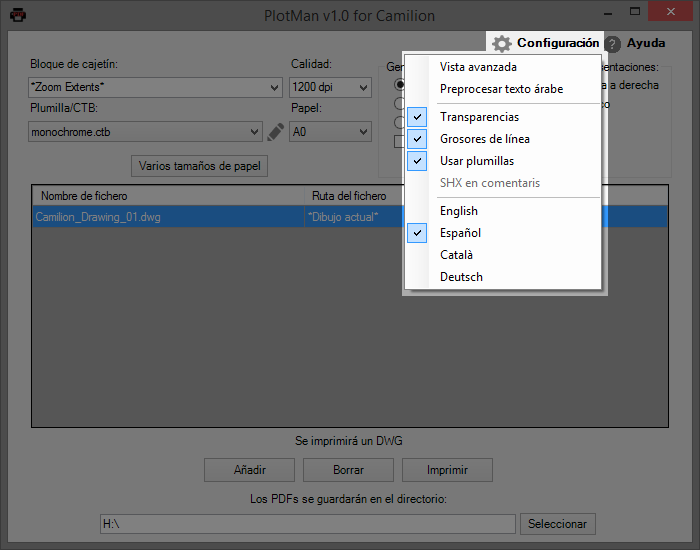
Advanced view
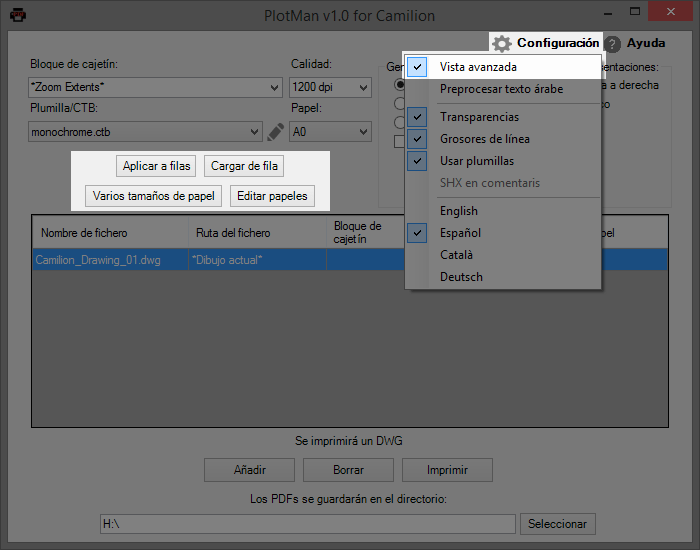
By default, it will be disabled. When activated, new configuration options will appear:
The central table acquires three columns: Box block, Quality and Paper settings. These columns are initially empty.
If these three columns are empty for a file, the values will be used which are selected in the Top of the interface.
When you click on Apply to rows , the settings in the Top of the interface, it will be saved in the rows that are selected. From this point, modify the settings in the Top of The interface does not modify the configuration of these files.
When you click on Load from row , the configuration of the row is loaded, selected in the central table at Top.
To change the configuration of a row again, it is necessary to return to use Apply to rows .
Process Arabix text
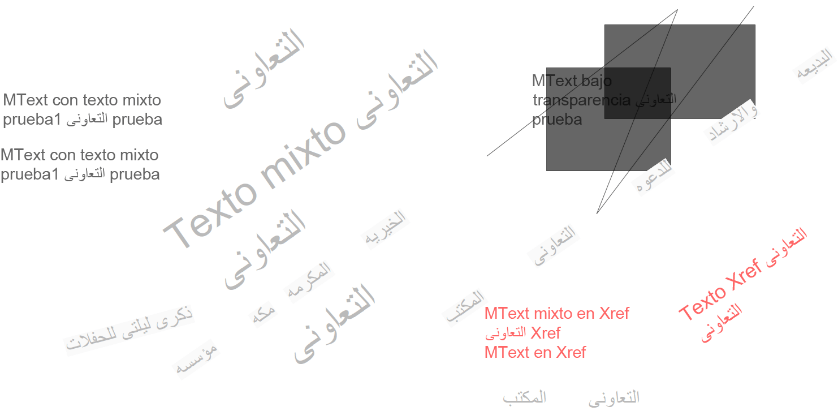
Due to a limitation of AutoCAD, when printing text with transparency Arabic can be affected.
To mitigate this problem we add this option that replaces the texts * on-site * and only for printing. This produces a readable result but a slightly different appearance.
| Original Text | Printing with Transparencies | Printing with This Method |
|---|---|---|
| الحكومي | ا ل ح ك و م ي | الحكومي |
| التعاونى | ا ل ت ع ا و ن ى | ﺍﻟﺘﻌﺍﻭﻧﻰ |
This option is always available but is only activated automatically if Arabic text is detected and transparencies are activated.
Transparencies
Default activated. Determines whether the transparency values of layers and objects will be used. If disabled, all objects will be opaque.
Line thicknesses
Default activated. Determine whether the line value of the drawing will be taken into account. When deactivated, all lines will be printed without line thickness.
Use Pens
Default activated. Determines whether the pens / CTBs that have been selected will be used. When deactivated, it will no longer be possible to select pens and the PDF will be generated using the same colours as AutoCAD.
SHX in comments
This option allows text search within the resulting PDF but also Increase the file size.
By default it is always deactivated but we can activate it at will.
In versions prior to AutoCAD 2016 SP1 this option is not available and texts are never saved as comments.
Enhancements integrated in PlotMan
Feedback Messages
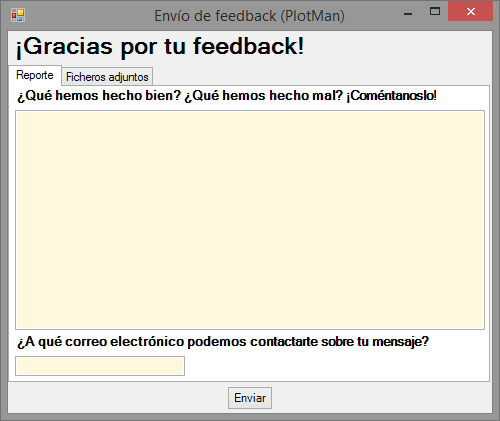
In case of error in the execution due to program failure, a window, where the user can explain at what point in the process the program has stopped working, and our technicians will receive such communication to solve the problem.
Related content
Save more than 90% of the time with PlotMan
Unlock a world of efficiency with Camilion and Save time. Click to revolutionize your workflow now!


