If you’ve worked in big Revit® projects, you know that using revisions in your sheets is mandatory to track deliverables. Unfortunately, adding or deleting revisions from a group of sheets is quite time consuming, as you need to go sheet by sheet. What if you have 50 sheets? What if you have 500?
Well, with the Sheeets plugin it takes just a few seconds.

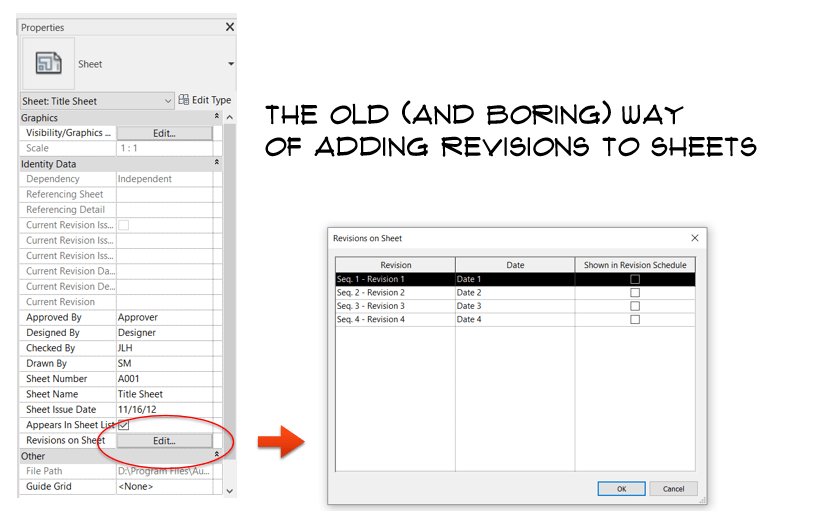
The old (and boring) way of adding revisions to a sheet
To add a revision to a sheet using Revit’s default method, you simply click on the Edit button of the Revisions on Sheet property.
This opens a dialog where you can apply the revisions you have in your project to that sheet.
Note: To add, delete or modify revisions from your project, see this link.
Now, if you have to do this for 50 sheets, you can repeat this process 50 times… or:
Using the Sheeets plugin to add Revisions to sheets
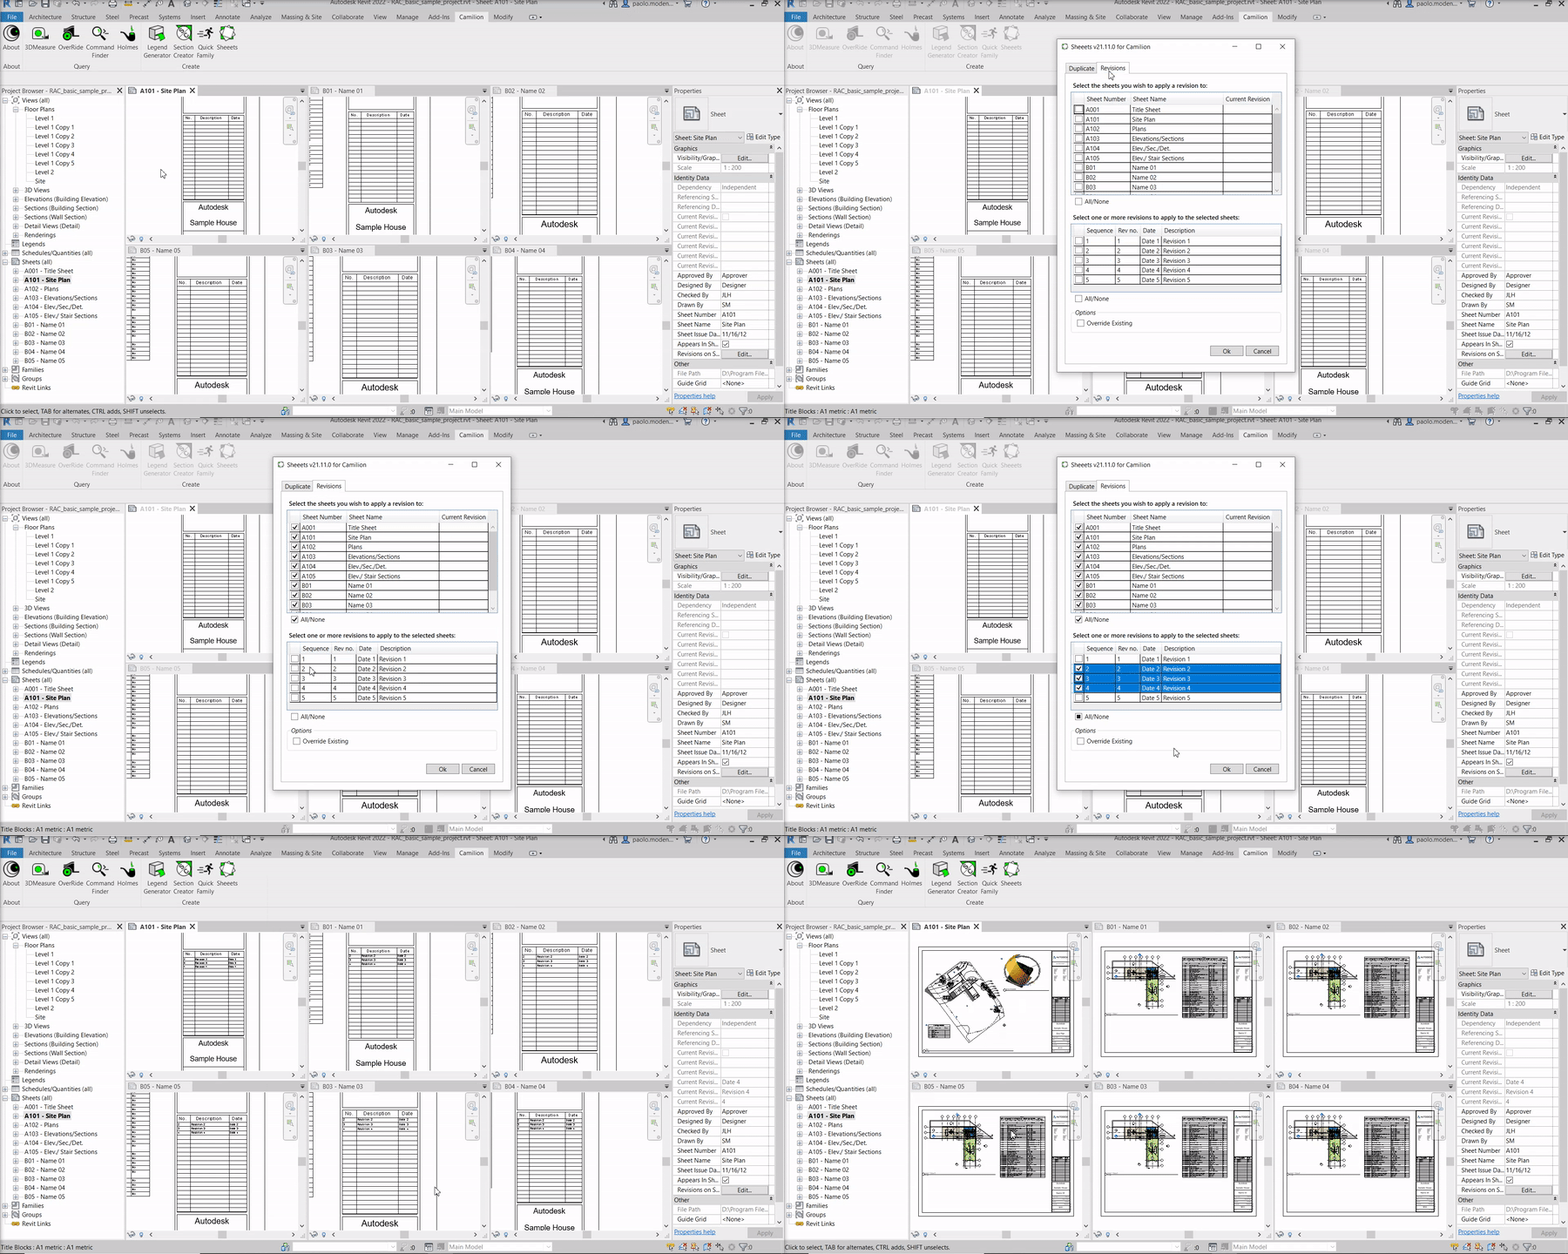
The Sheeets plugin has a Revisions tab that lets you add revisions effortlessly with a couple of clicks.
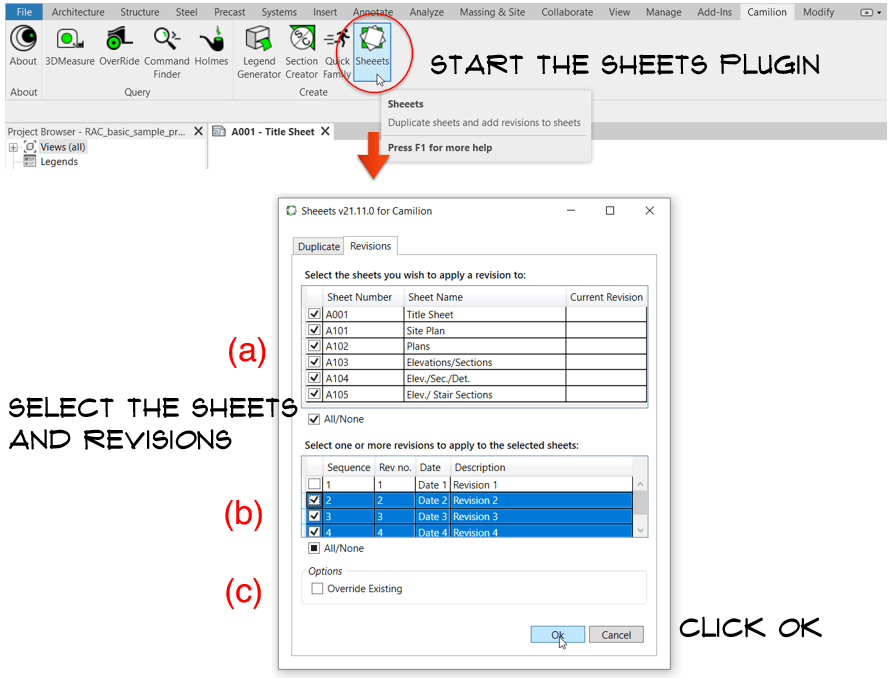
In the Camilion tab, find the Sheeets button and click on it. Go to the Revisions tab. Here, select the sheets (a) you wish to apply a revision to and then select the revisions (b) to apply to the previously selected sheets.
You can choose to override any existing revisions (c).
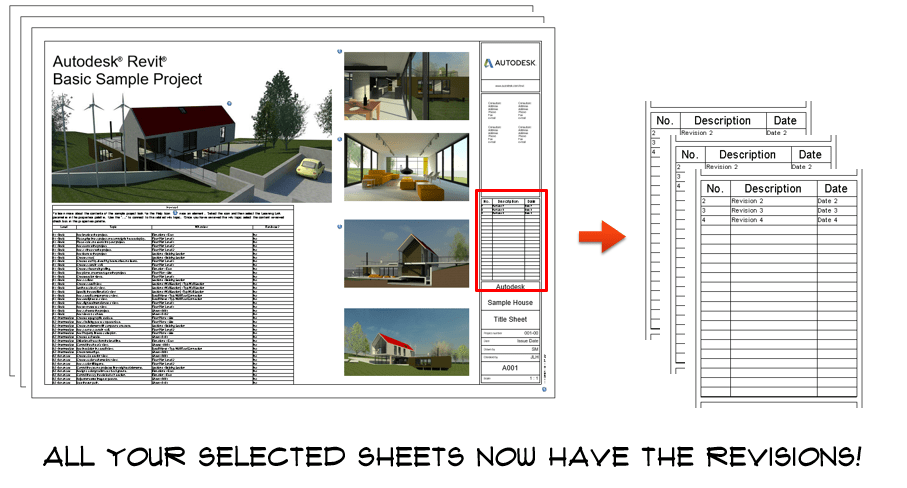
When you’re ready, click Ok and sit back and relax while your sheets get populated with revisions.
Conclusion
The Revisions functionality is certainly a big time saver when it comes to projects with many sheets or revisions.
Weather you want to add one revision to 100 sheets or add 100 revisions to one sheet, this plugin gives you the flexibility and power to get the job done quickly and efficiently.
Because your time should be devoted to more important things than adding revisions. Try it now.


