Autodesk® Revit® is a very complex BIM software that allows you to do many things in many ways.
But if there’s one feature that has always been missing for this software that’s precisely the ability to measure in 3D.
This seemingly trivial task for some reason has not been integrated yet as of 2021 release, so the dev team at Camilion decided to create the 3DMeasure tool.
What is 3DMeasure
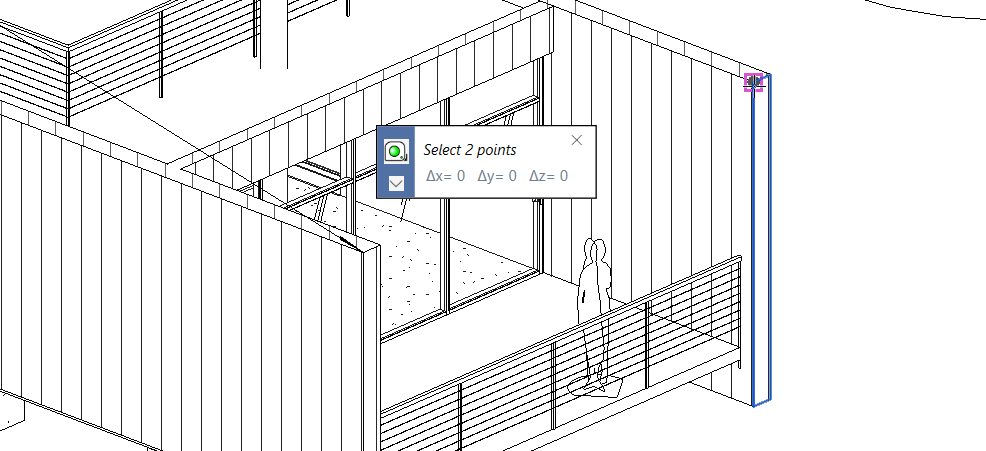
The 3DMeasure tool is a plugin for Autodesk® Revit® which allows you to measure in a 3D view by selecting 2 points or an existing edge.
Starting 3DMeasure
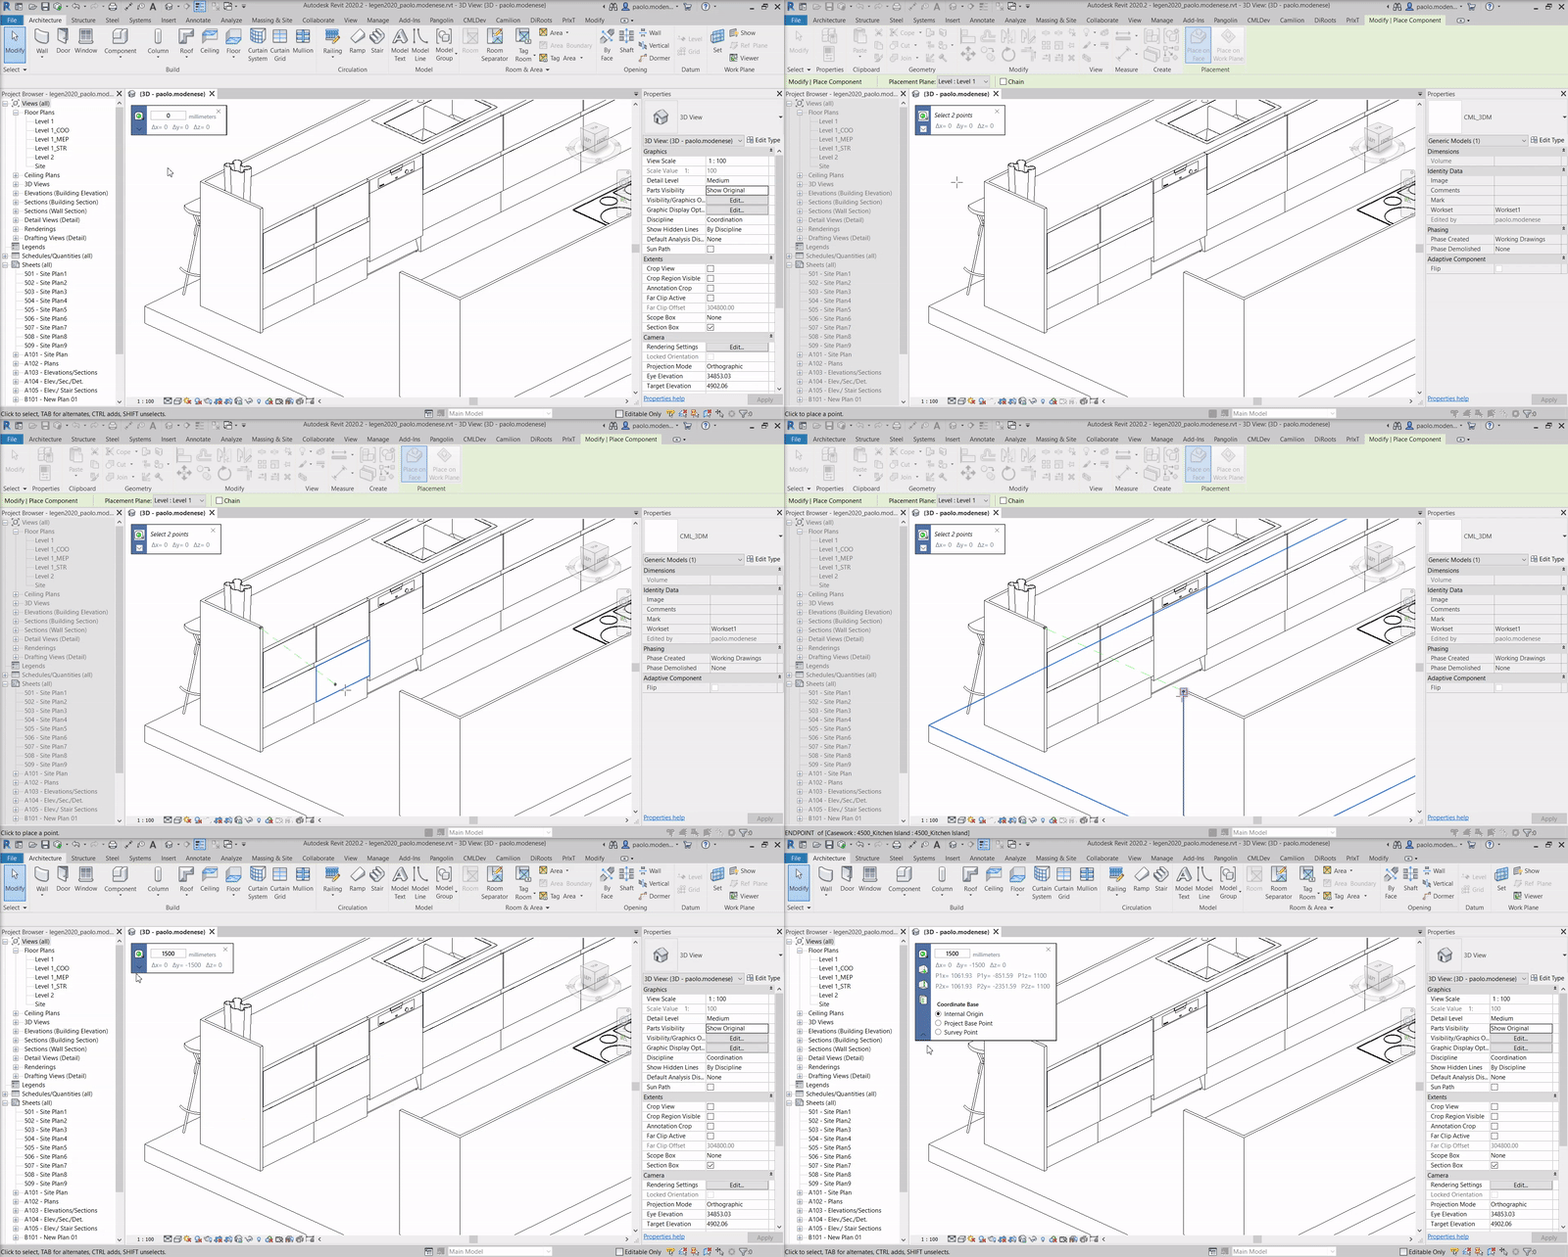
To start the plugin, click on the 3DMeasure icon located in the Camilion tab, a dialog box will be displayed and you’ll be prompted to select 2 points.
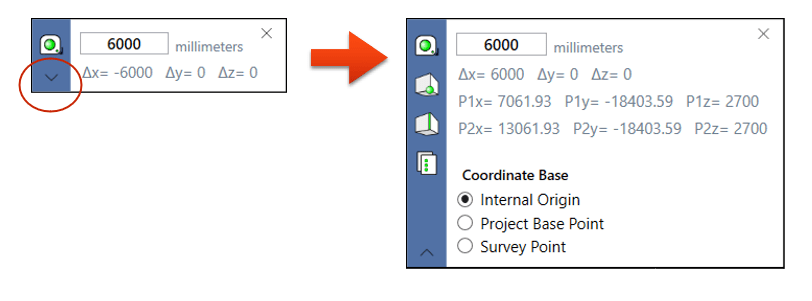
After clicking on the second point, the dialog box will be updated to reflect the distance between the 2 points and the delta of each coordinate pair.
To take another measurement, you can simply press Enter.
You can click on the down arrow to expand the dialog box and reveal other buttons and data.
The data
If you expand the dialog box, you can find the following data:
- Deltas (Δ): this is the difference between coordinate pairs (Δx = pt1X – pt2X)
- Coordinates of point 1
- Coordinates of point 2
- Coordinate base used: there are 3 coordinate bases available. Changing the base updates the coordinates instantly.
The units
The units and rounding are set to the project units (press UN to see your project units).
The buttons
In total we find 4 buttons. These are:
- Measure
- Select a point
- Select an edge
- Copy to clipboard
They are explained in detail below.
Measure
The measure button allows measuring in any 3D view with 2 clicks.
Since this is the most used command, we designed the app so that this command will start automatically as soon as you start the 3DMeasure plugin.
Select a point
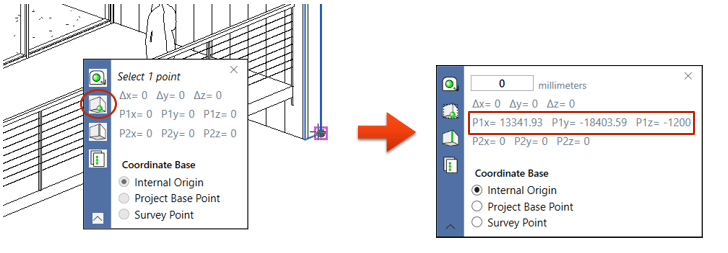
Say we want to query the coordinates of the base of a wall we’re working on. To do this, simply click on the Select point button and then select a point in the model.
The data in Point 1 will be immediatly updated and all other data will be set to zero.
Select an edge
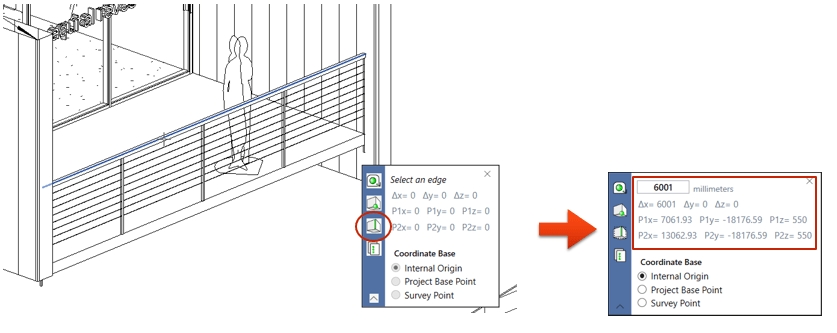
Now we want to see how long the railing is.
We can do this easily by selecting the Select edge button and selecting one of the railing edges. As soon as we select the edge, the data in the 3DMeasure dialog is updated.
Copy to clipboard
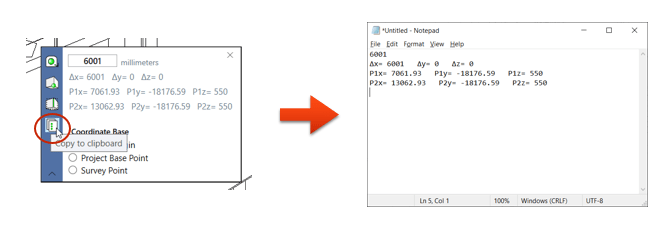
The last thing we want to do now, is copy this data to a .txt file.
For that purpose, we simply click on the Copy to clipboard button. The data has now been copied.
Open notepad and press Ctrl + V to paste the data.
Conclusion
Having the ability to measure in 3D easily is a basic functionality that will speed up any kind of workflow.
Try out 3DMeasure for free here.

