AttMan |
Plugin for AutoCAD
From €400

AttMan’s main functions
Select the attribute block
Select the files containing these attribute blocks
Display the text contained in the attribute blocks in the spreadsheet
Apply the desired changes so that the DWG files are automatically modified.

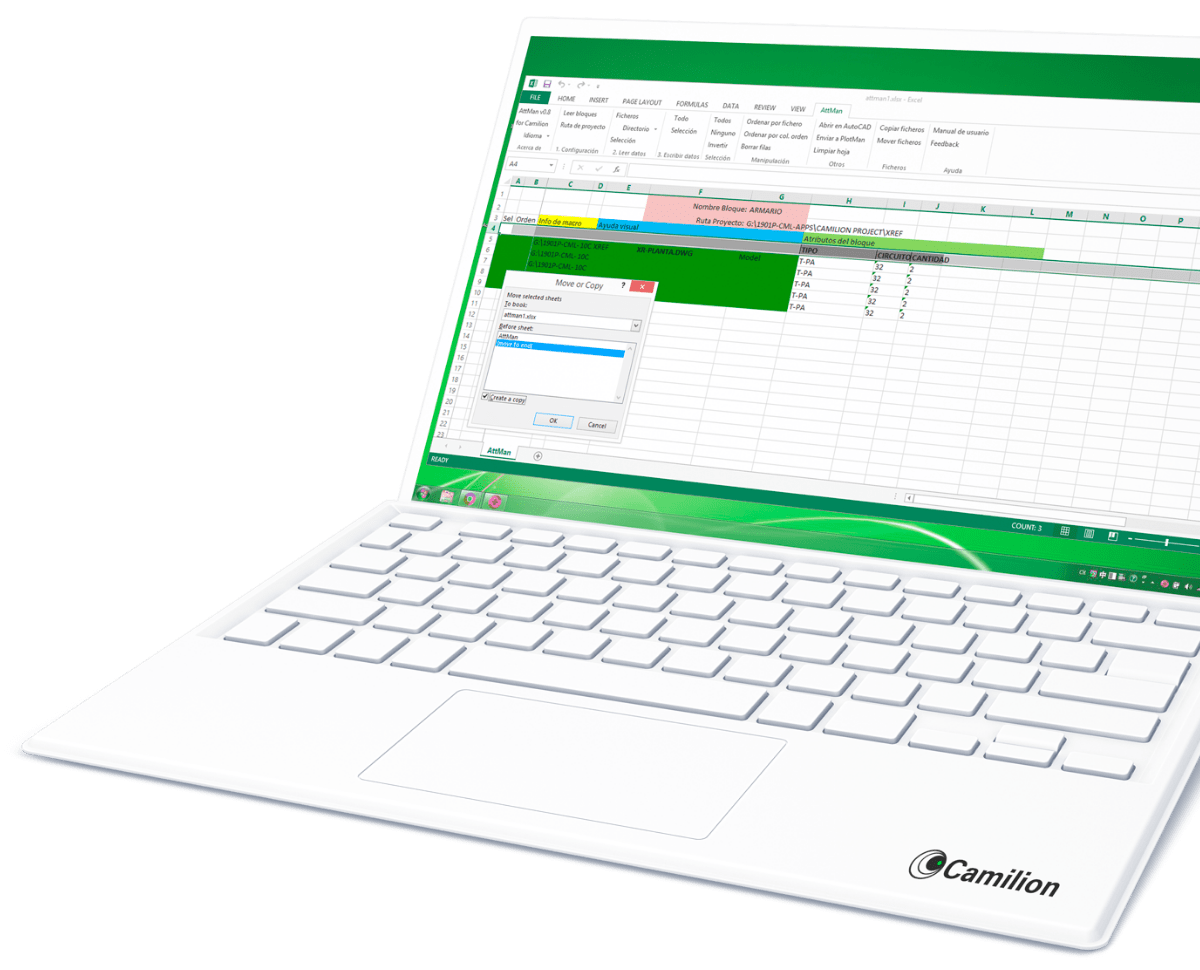
Set up your customised plan
Do you need a customised solution?
Count on us for a customised solution that perfectly fits your needs.
Save more than 90% of time with AttMan
System AttMan
- Open Excel
- Read block with text of attributes of a plan that contains it (30s)
- Read a thousand plans (45 min) where the user can do another task
- Modify in the table of operations all the information that is needed, using all the potential of Excel (45 min)
- Apply the changes (45 min) where the user can do another task.
Total 135 min x 1000 plans
Traditional system
- Open DWG containing the block with attribute texts
- Select the attribute text block and modify it
- Carry out the same operation with the 1000 plans to be modified.
- Estimated time: one minute per plan
Gain time
How to use AttMan
Other products that work with AttMan
Save more than 90% of the time with AttMan
Unlock a world of efficiency with Camilion and Save time. Click to revolutionize your workflow now!
Documentation
What is AttMan, an AutoCAD plugin with Excel integration
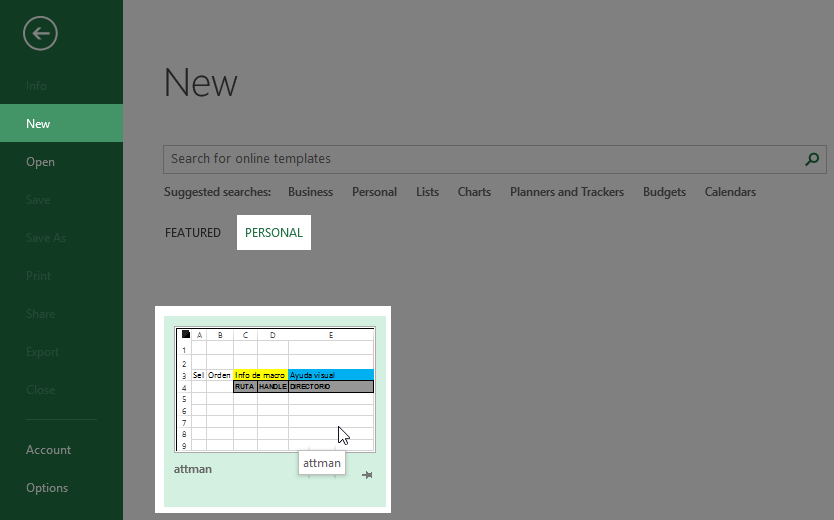
AttMan is a template for Excel, so to create a new file you have to select the template from the new menu, in the Personal section. If you want to modify an existing AttMan file, just open it.
Graphic interface
The AttMan interface is integrated into the basic menus of the Excel spreadsheet.
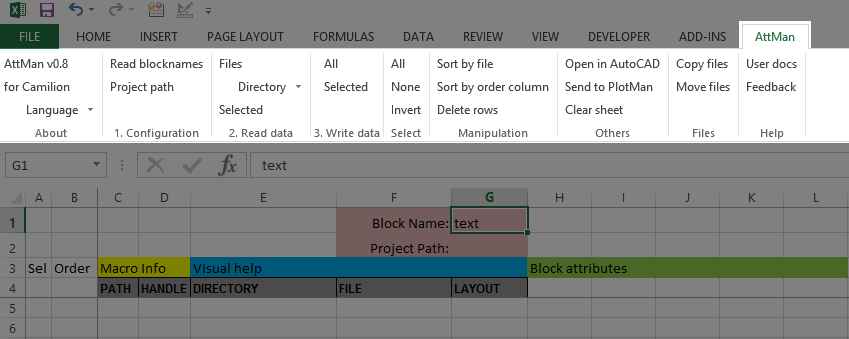
Once an AttMan file is created, we will obtain the following window, with two defined spaces:
- Menus and options box
- Table of operations
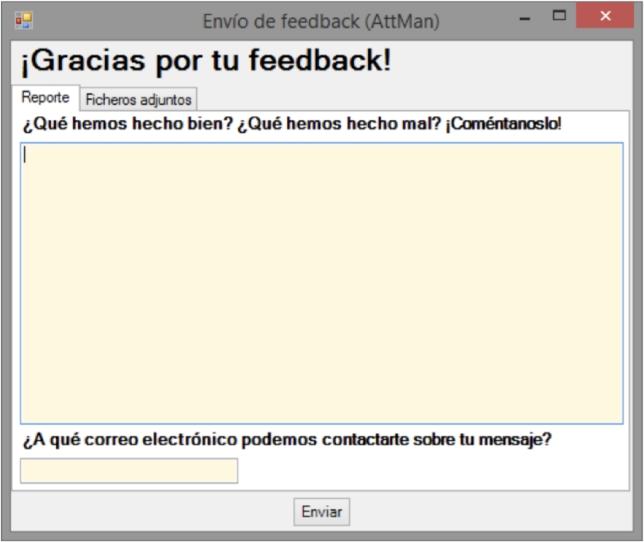
If the program detects an error, a Feedback Message window will appear.
Menu
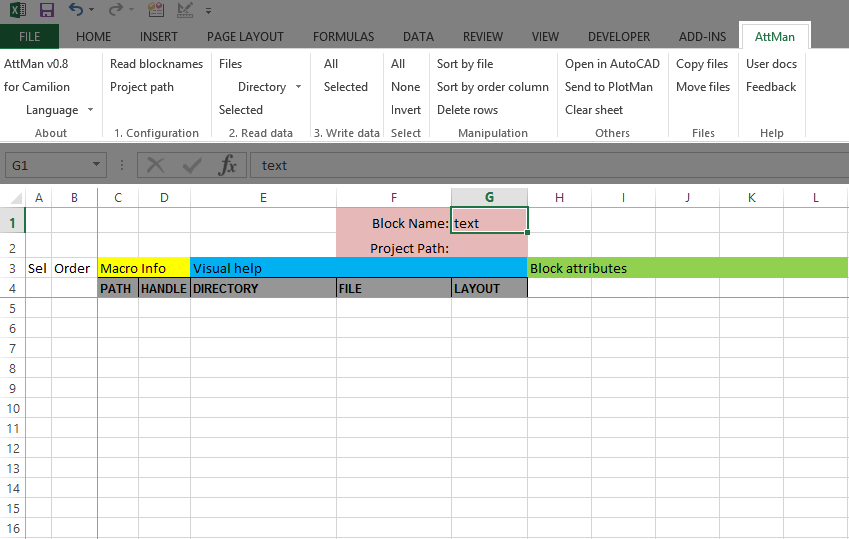
At the top, we find a menu integrated in the Excel menus, with all the applications and options that the program allows.
About
It informs us of the version of the program and allows us to change the language.
1. Configuration
This menu allows us to configure the first part of the program with the following options:
- Read blocks : Detects all the blocks contained in the DWG. We will select in cell G1 the name of the block that contains the attributes that we want to process.
- Project path : It allows us to save the path that will be used for file selection dialogues.
2. Read data
This menu allows us to select the files we want to process with the following options:
- Files : A search window emerges with the address of the project path, where we can select the files we want to process, reading the selected block of each file.
- Directory : A search window emerges that allows us to select a directory where the program will select all the files it contains, reading the selected block of each file.
- + Subdirectories : Additionally read the files in subdirectories recursively.
- Selection : Reread the attributes of the block that we have already processed in the spreadsheet and that are selected in the selection column A.
3. Write data
This menu allows us to write the data represented in Excel to the DWG files with the following options:
- All : Process all the spreadsheet attributes.
- Selection : Processes the files marked in the selection column A .
4. Selection
This menu allows us to manage the selection column A with the following options:
- All : Select all the attributes of the spreadsheet (with an X ).
- None : Removes all X from the selection column.
- Invert : Reverses the state of the selection column.
The selection column can be filled in by writing an X , or selecting it all and deleting theX of the blocks that we don’t want to process.
5. Handling
This menu allows us to modify the order of the spreadsheet rows without losing the information with the following options:
- Sort by files : Sort in alphabetical order, the spreadsheet rows by column F of * Files *.
- Sort by col. order : Sort in alphabetical order, the spreadsheet rows by column B of * Order *.
- Delete rows : Deletes the selected rows from the spreadsheet. Note: this does not delete the block of the respective DWG file.
- Clean sheet : Remove all information from the spreadsheet.
6. Other
This menu allows us to connect to the program with other AutoCAD options with the following options:
- Open in AutoCAD : It allows us to open the Excel file containing the attribute from Excel. We will open a window where we will choose one of the following options:
- Open Excel selection *
- Open by column Sel. *
- Send to PlotMan: It allows us to send PDF files containing the blocks with attributes. A window will open where we will choose one of the following options:
- Print all *
- Print Excel selection *
- Print by column Sel. *
7. Files
This menu allows us to manage the files processed by the program with the following options:
- Copy files : Copy the processed files to any other address, allowing you to modify a copy, keeping the old files.
- Move files : Move the processed files to any other address without losing connections for this application.
If some External References do not use relative routes, this could result in problems, to avoid them we recommend using RefMan before and after.
Help
This section allows us to access the help and contact our team of developers, with the following options:
- User manual : For any doubt with the operation of the program, here we have the Manual.
- Feedback : If the user has any problem or any proposal for improvement that the program may have, our team of developers will be at your disposal.
Operation table
The spreadsheet where we will find all the information contained in the attribute texts of the different DWG files that we are going to edit.
- Edit Fields : Once we have the files sorted as desired, we can start editing the different fields of the different columns that have been created, of the attribute block.
- Fill Fields : In the same way, we can fill in the fields of the block where there is no information.
Beware of the reorganization of rows and columns, you must always keep in mind to move the entire column or entire row.
Once we have all the desired fields edited, we will use the Menu 3. Write data to apply the changes.
A process bar will appear on our desk, indicating the operation of the program.
Feedback Messages
In the event of an error in the execution due to a program failure, a window will be activated, where the user can explain at what point the process has stopped working, and our technicians will receive this communication instantly to solve the problem.
Related content
Save more than 90% of the time with AttMan
Unlock a world of efficiency with Camilion and save time. Click to revolutionize your workflow now!


