Autodesk® Revit® is a very complex and complete BIM software that allows you to do many things in many ways.
But if there’s one feature that has always been missing for this software that’s precisely the ability to measure in 3D.
This seemingly trivial task for some reason has not been integrated yet as of 2021 release, so the dev team at Camilion decided to create the 3DMeasure tool.
What is 3DMeasure
The 3DMeasure tool is a plugin for Autodesk® Revit® which allows you to measure an existing edge or to select 2 arbitrary points in space.
A dialog box shows you the distance between these 2 points as well as their Delta values and Coordinates.
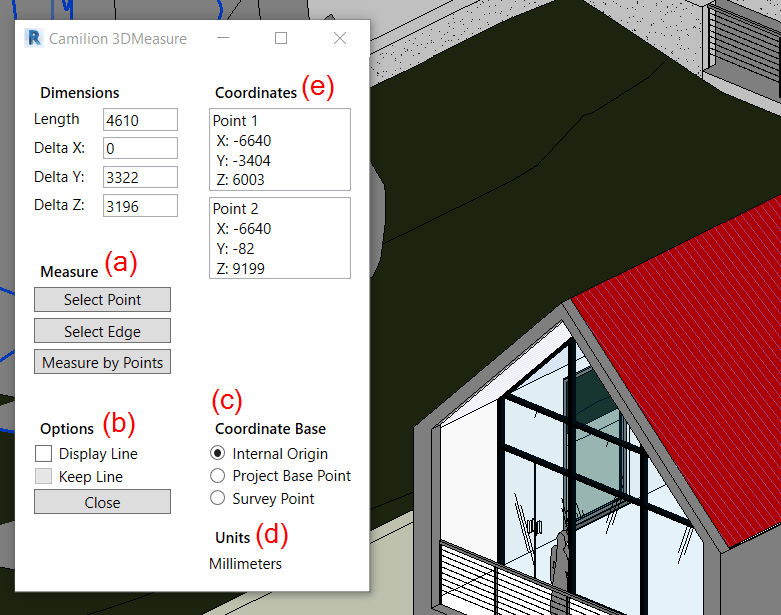
Let´s take a closer look at the 3DMeasure dialog box:
Taking measurements
After clicking on the 3DMeasure icon located in the Camilion tab, a dialog box will be displayed.
Under the Measure section (a), you can choose between the 3 buttons: Select Point, Select Edge or Measure by Points.
Let’s explore in detail each button.
Select Point
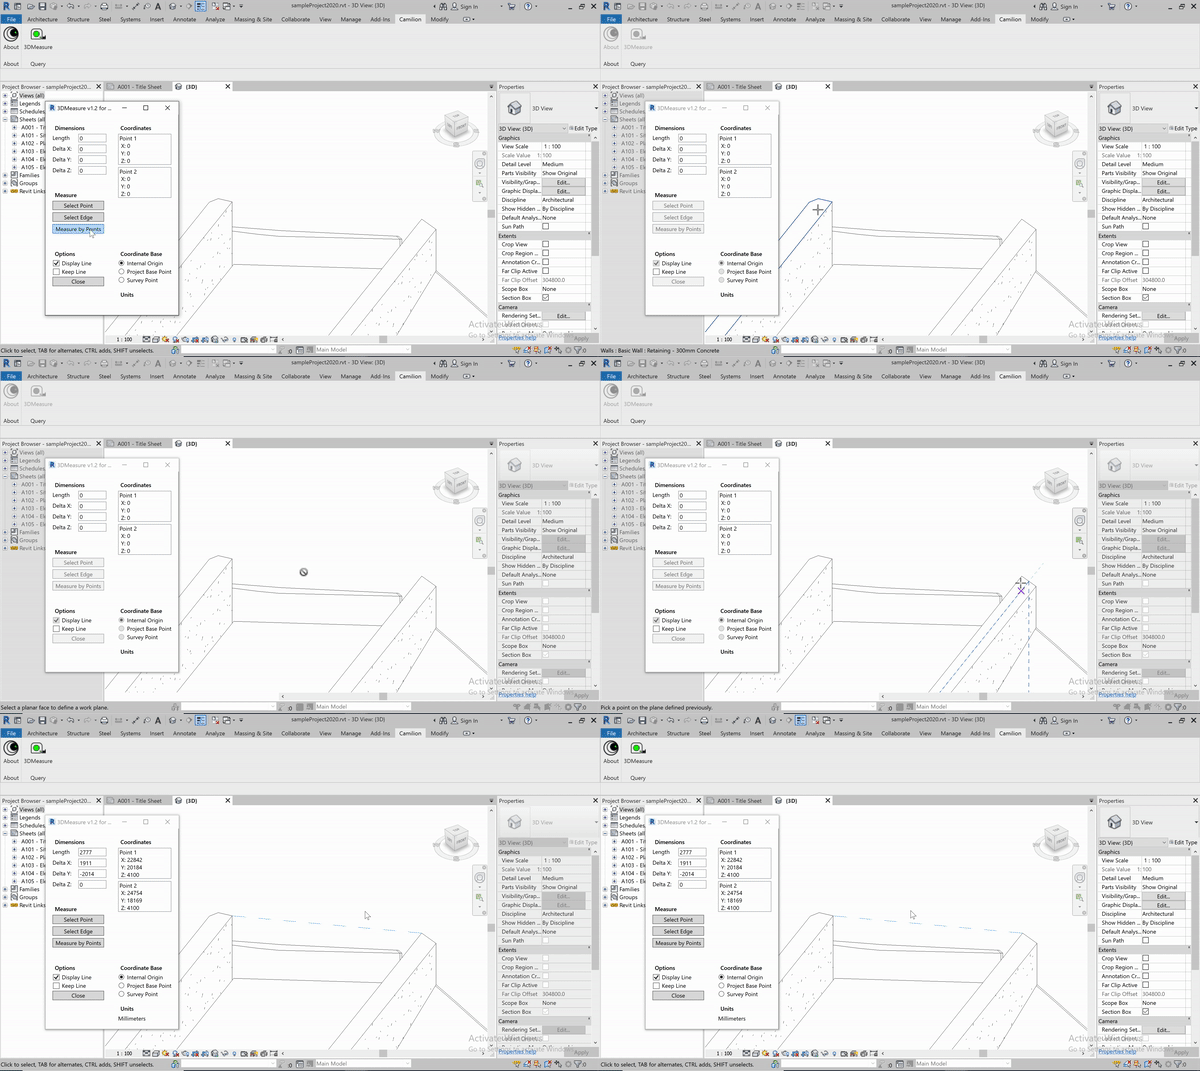
Clicking on Select Point will prompt the user to click twice: the first click is needed to select a planar face to define a temporary workplane; the second click defines the actual point. When the second click is performed, the Coordinates section (e) is updated to reflect the coordinates of the chosen point (works for links as well).
Select Edge
Simply prompts the user to select an existing edge in the model (links included). Once the selection is performed, both the Dimensions section and the Coordinates section are populated with data.
Measure by Points
This command prompts the user to select 2 points in the same manner Select Point works: first, a surface must be selected and then a point on the surface defines the actual point. These 2 clicks must be repeated to define the second point.
After the 4 clicks have been performed, the Dimensions and Coordinates sections will be updated with the data relative to the chosen points (works for links as well).
Tip: if any command is active, Revit’s® user prompt, located in the lower left corner of the UI, displays a message regarding the expected operation to be performed by the user to complete the command.
Temp lines and Coordinates
Options (b)
If you with to visualize a temporary line, you can activate the Display Line checkbox.
This line will be deleted automatically on the next measurement taken or after the 3DMeasure app is closed, so there is no need to delete it manually.
If you wish to keep this line, just tick the Keep Line checkbox.
Coordinate Base (c)
Note that in any moment you can change the coordinate base to any of the three available options:
InternalProject Base PointSurvey Point
The coordinates will be updated automatically upon changing the coordinate base.
Units (d)
The units used and the rounding applied will be defined by your project settings. To change the units or rounding simply go to Manage > Settings > Project Units. A text will appear under the Units section to indicate the units that are currently being used.


