We’re always committed to improving our apps, and after gathering some valuable feedback from our clients, we’ve been busy improving our LeGen, a plugin for Autodesk® Revit® Software.
With this upgrade we not only add more options like patterns and lines, but we make creating your LeGends even easier!
The upgrades in a nutshell
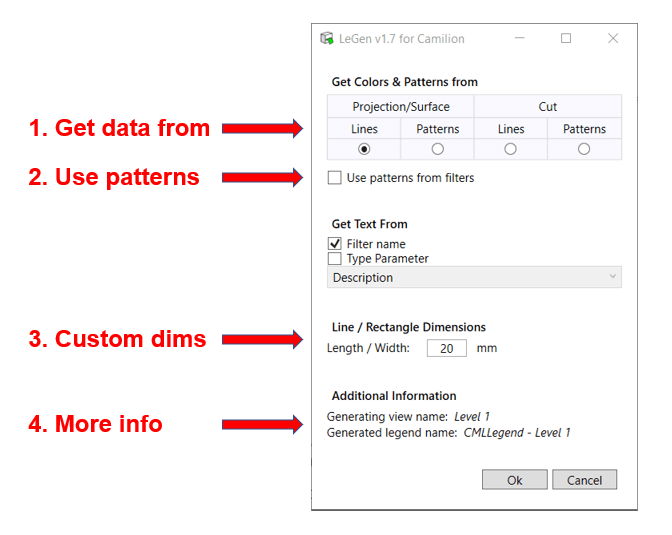
The upgrades performed on LeGen v1.7 are the following:
- Get data from: Now you can choose where to get the colors and patterns to populate your legend. Choose between
Projection lines,Projection patterns,Cut linesorCut patterns. The interface was designed to resemble the Visibility & Overrides dialog box in Revit. - Use patterns: Now you can choose to display the patterns set in the filters for both lines or fills. If this checkbox is unchecked, a solid line or a solid fill pattern will be applied.
- Custom dims: A textbox allows you to enter a measurement in millimeters that will become the length of the line or the width of the rectangles.
- More info: New information shows you the name of the generating view and the name of the generated legend.

The upgrades in detail
Setting up the filters
To demonstrate the new functionalities, we’ve set up some filters with Projection lines (a) and Cut patterns (b) overridden. As you can see in the image below, both colors and patterns have been overridden.
Create a legend from patterns
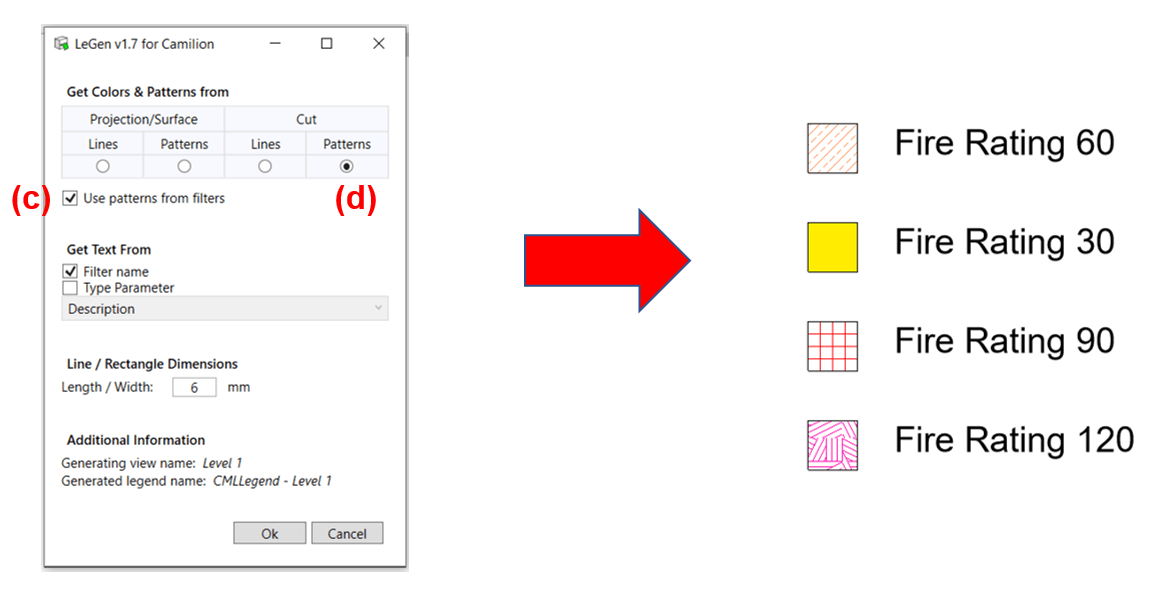
If the Use patterns from filters checkbox is activated (c), and the Cut Patterns radio-button enabled (d), the resulting legend will show both the colors and the patterns for each entry.
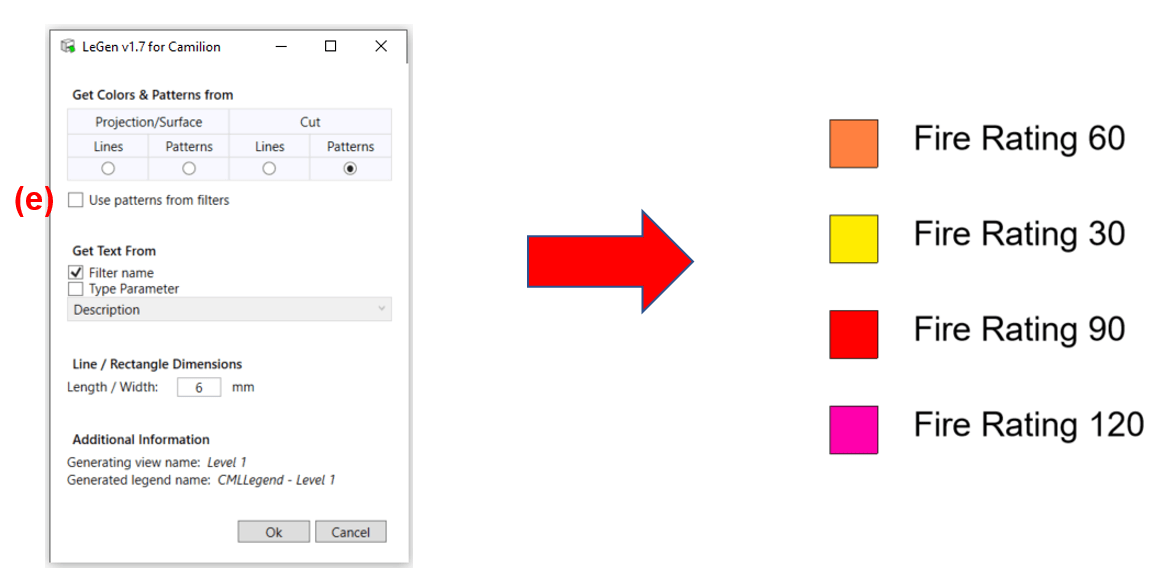
If, on the other hand, the Use patterns from filters checkbox is not activated (e), the resulting legend will show the colors and a solid fill pattern for each entry.
Create a legend from lines
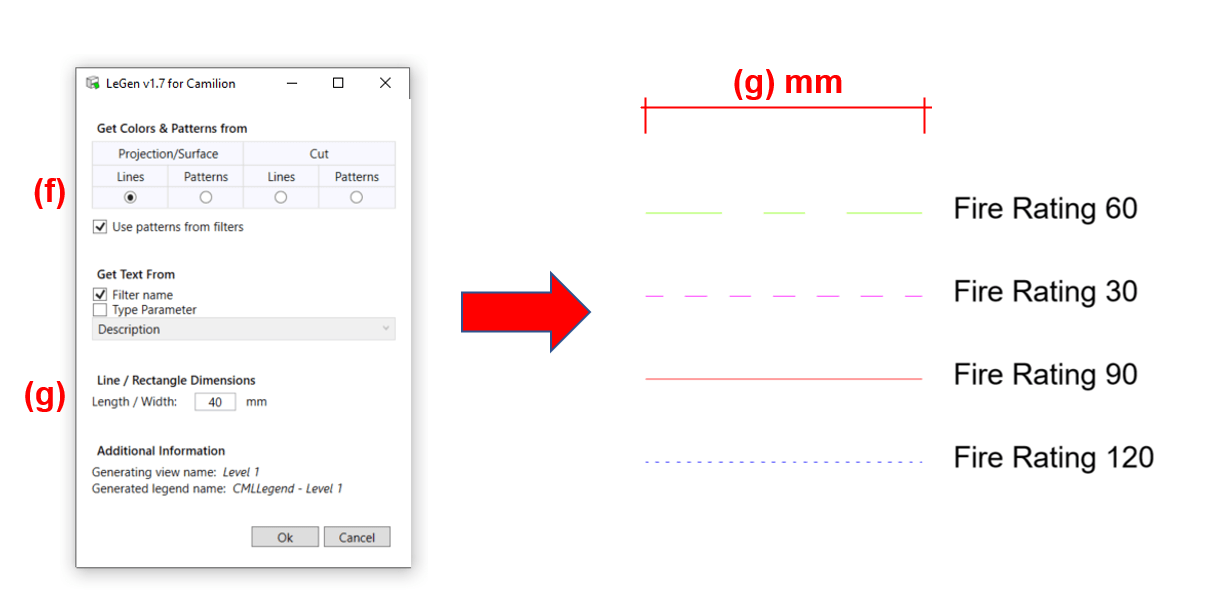
The same logic described above applies for line overrides. In this example, the Projection Lines radio-button (f) is activated and the Use patterns checkbox ticked, this results in a legend with lines as keys. Each line has an overridden style that matches the filters overrides.
Also, now you can customize the length of the lines by modifying the textbox shown in section (g). The length is measured in millimeters and if the keys are patterns, this will affect the rectangle’s width.
Changing the legend’s size
To make your legend larger or smaller, you simply need to change the size of the CML Textnote type created upon creating the legend (select any of the text notes created and edit it’s type). Once this is done, simply re-run the LeGen plugin and the legend will adjust to the new size of the text.
Conclusion
It’s been almost a year since LeGen has seen the light and little by little we keep on making improvements based on our users feedback and the evolving industry needs. We’re committed to the evolution of the AEC industry and the progressive adoption of BIM technology.
If you think LeGen is for you, download it for free today and let us know what you think!


