RefMan |
Plugin for AutoCAD
RefMan is a plugin for Autodesk® AutoCAD® software to easily manage external references in numerous DWG files.
From €200
RefMan’s main functions
Load hundreds of files within seconds
Get an overview of external references and images
Bulk fix paths, rename or delete xrefs and images
Ensure correct AutoCAD versions and purge as needed
Bulk create e-transmit-like files

Set up your customised plan
Do you need a customised solution?
Count on us for a customised solution that perfectly fits your needs.
How to use RefMan
Other products that work with RefMan
Save more than 90% of the time with RefMan
Unlock a world of efficiency with Camilion and Save time. Click to revolutionize your workflow now!
Related content
Save more than 90% of the time with RefMan
Unlock a world of efficiency with Camilion and Save time. Click to revolutionize your workflow now!
Documentation
Compatibility
Currently, RefMan is compatible with:
- Autodesk® AutoCAD® versions 2019 to 2026
AutoCAD plugin for xref management
RefMan utility to ensure valid reference paths and relative reference paths
Suppose we have to work on a new project and, that this must be mounted on one hundred files with a large number of associated references. At the time of saving them in the destination folder, the name of the folder was changed, which could have resulted in invalid reference paths.
Since the project is so large, it would take a long time to open each of the files to confirm that relative reference paths have been used or update each one.
Thanks to Camilion’s Apps RefMan , the files can be uploaded in the same sale and can be directed from the same site to modify the reference routes.
RefMan reads the files and searches for the references in the specified paths and detects the status of each one of them allowing them to update, modify, merge or delete them from the uploaded files.
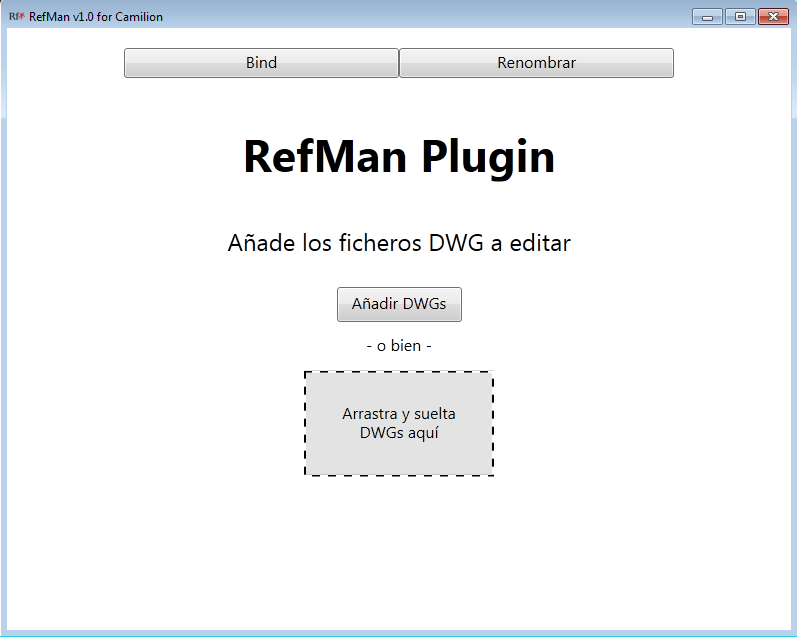
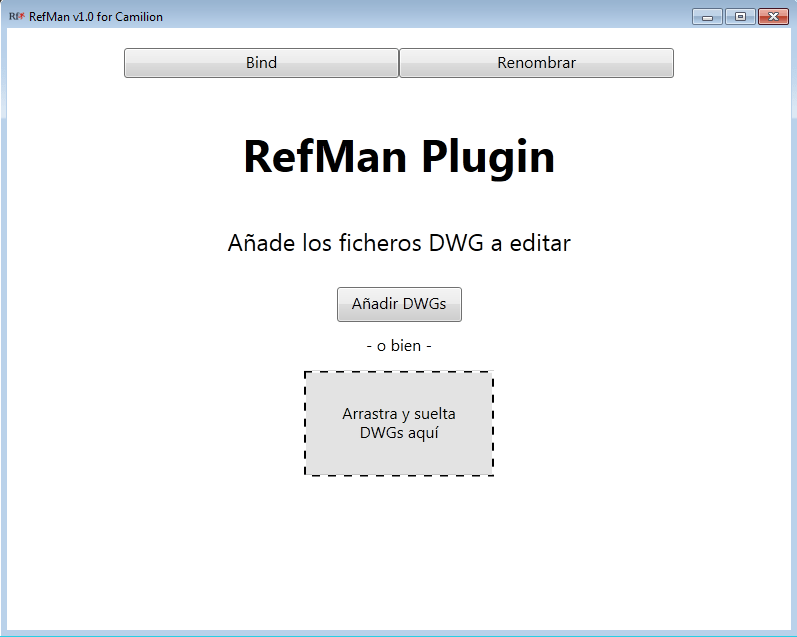
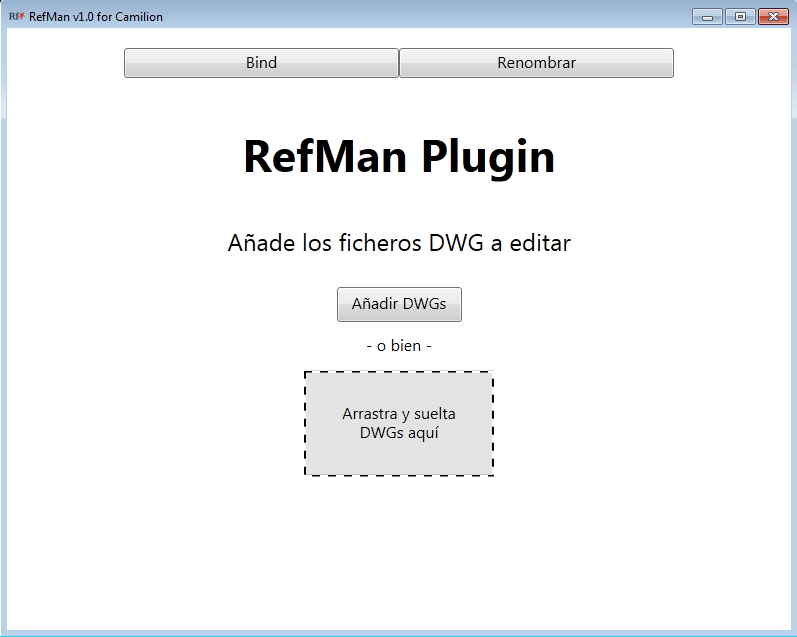
To use it, you must open any file in AutoCAD and type the REFMAN command. A window will open asking to add the DWG files that you want to analyze and / or modify.
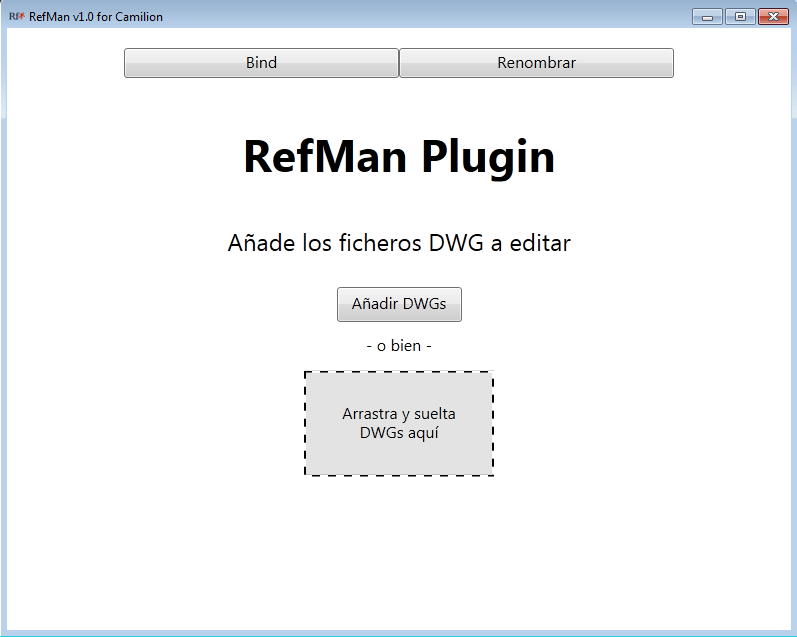
In this window we add the hundred files of the new project and select Bind or Rename according to our requirement.
Bind is used to make a “Bind” in the added files. This can be type “Insert” or type “Merge”.
Rename is used to manage references. It allows to see, modify the routes where are saved or deleted. It also allows copying, pasting or replacing references.
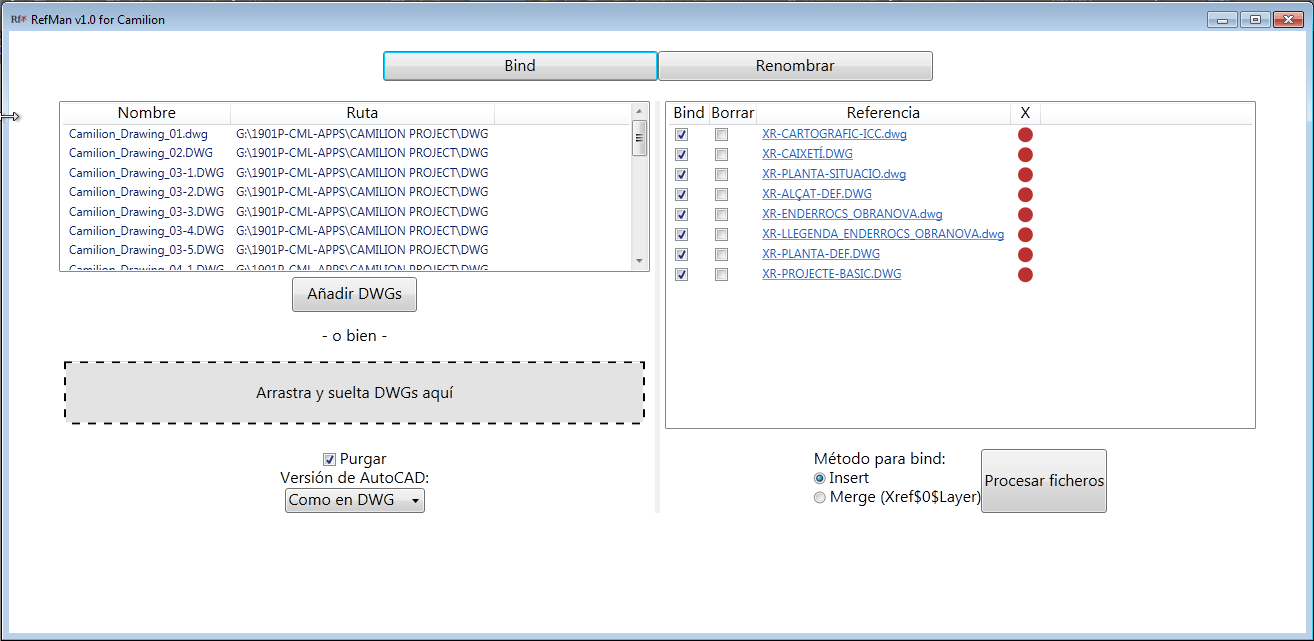
Once the files are loaded, a new window appears with two listings, one on the left and the other on the right (for both cases Bind and Rename ). The one on the left corresponds to the uploaded files. Throughout the process you can add new files; Thus, if a reference is modified that affects a file that is not in the initial list, it can be loaded and updated. This list has two columns, one with the name of the file and the other with the path where it is stored.
The list on the right, varies between the Bind and Rename options. In both cases there is a column (column “X”) that marks, with a color signal, the state of the reference (a kind of “traffic light”). This indicates in green that the reference is fine (the reference route is well specified) and in red, when there is a problem with the reference (there are problems with the reference route).
For the Bind option, there are three more columns. The first two (“Bind” / “Delete”) are basically to select some actions that can be executed by reference and the column that says “Reference” indicates the name of each of the loaded references.
In the Rename option, seven columns appear describing names, paths and directories where the references and the actions that can be executed in each of these are found.
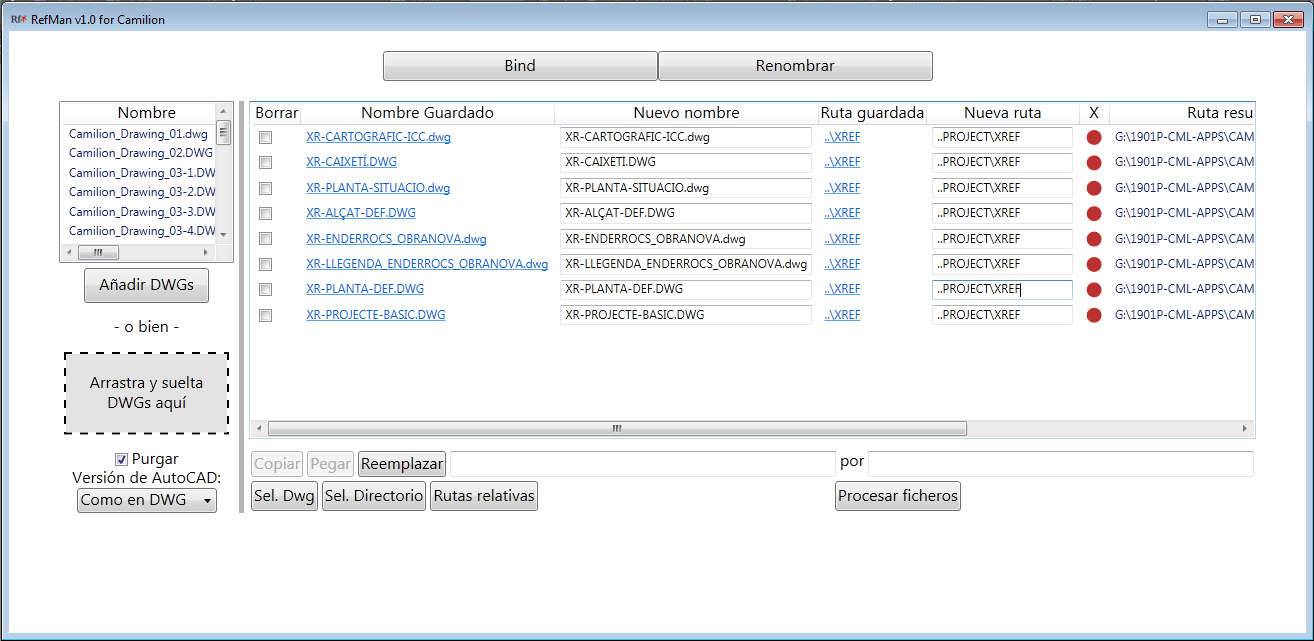
In this case, it is seen that the routes of the references are not good so it appears, for each of the references, a red alert in the “X” column. This is because the project was saved with a folder name different from the one it had when all the files were created and in addition to this, it can be read in the “Saved routes” column that the references are loaded in the files with the path absolute where they are.
So the following should be done. In the Rename option, click on the button that says “Relative routes”; This changes all the routes of the references and places them in relative form.
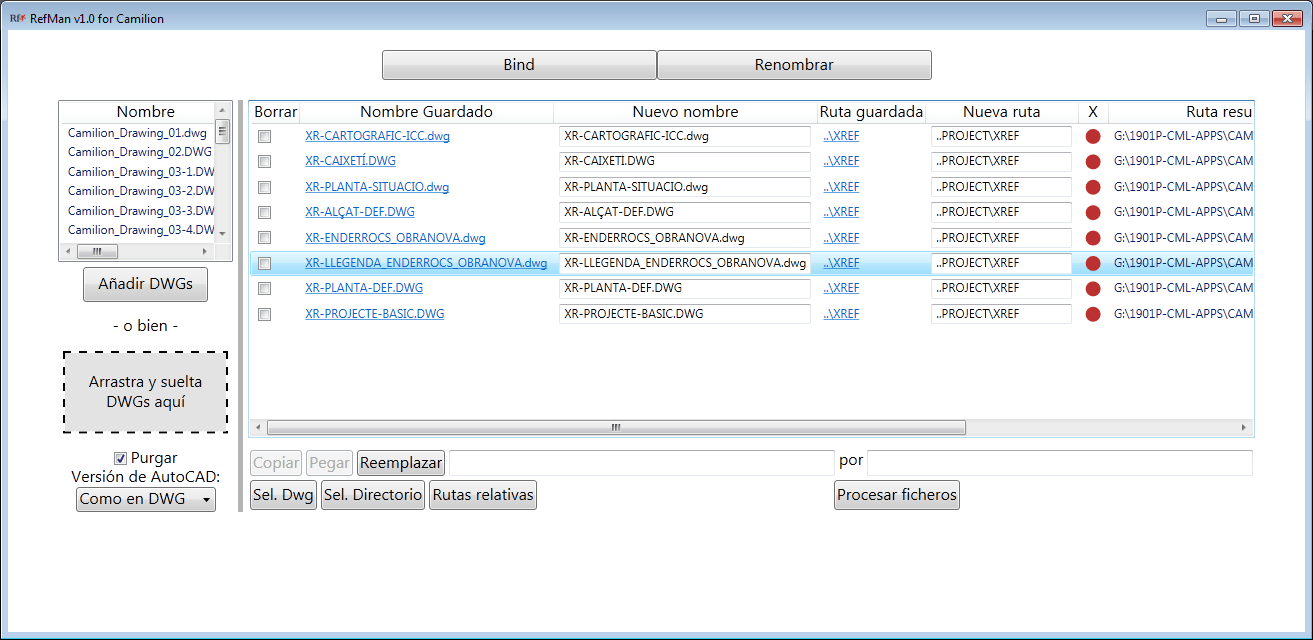
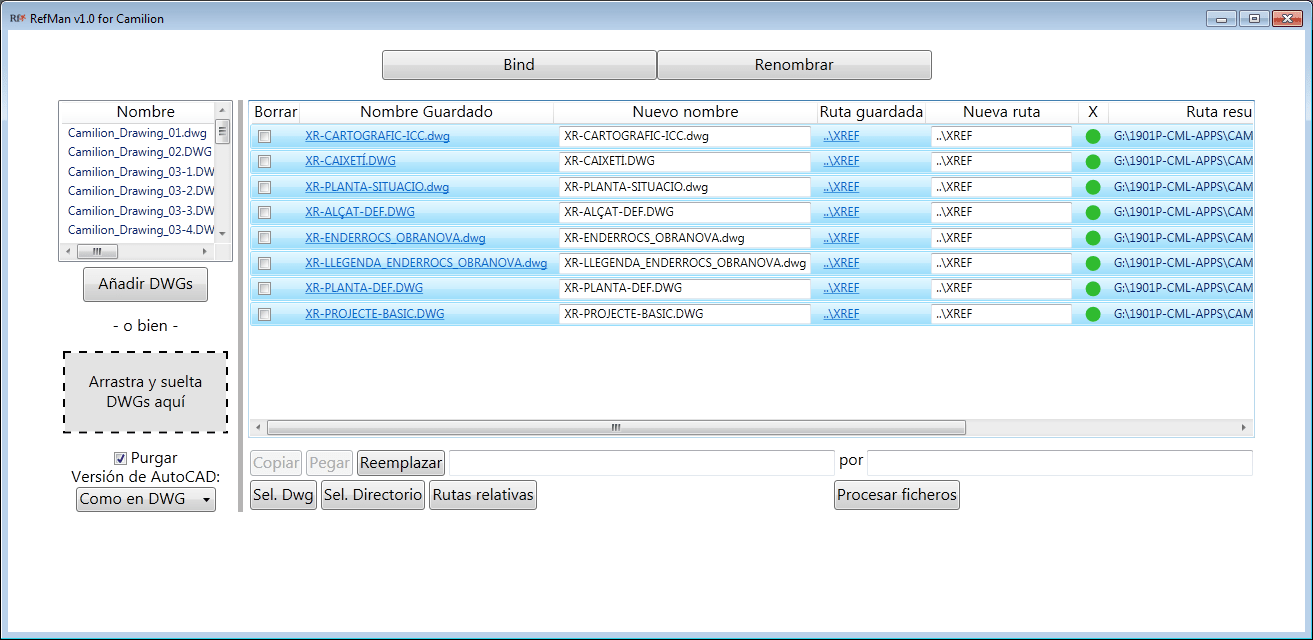
At that time the color signal changes to green, indicating that the references have been found and that everything is OK.
Once this is done, you must click on the button “Process files” and the application will execute, permanently, all the indicated changes, modifying each one of the files.
RefMan saves a backup file (.RefManBak) in the same folder you are working on, before modifying the files. If you need, for some reason, the backup version, you must delete the .RefManBak and place .dwg.
As you can see, this whole process is carried out very quickly and easily that, otherwise, would require a great effort and attention.
RefMan utility to generate Bind in files that require it
Continuing the sequence of the previous example. We have a project mounted on a hundred files and these in turn have a significant number of associated references. In determining point, the client asks for a project delivery, but wants it without associated references. One of the best ways to solve this is by doing a Bind in each of the files.
As it is a large project, doing this in a conventional manner would require a lot of time, since the files must be opened and modified one by one.
Thanks to Camilion’s Apps RefMan , we can upload the files in the same window and tell you to make a Bind of all.
To use it, you must open any file in AutoCAD and type the REFMAN command. A window will open asking to add the DWG files that you want to analyze.
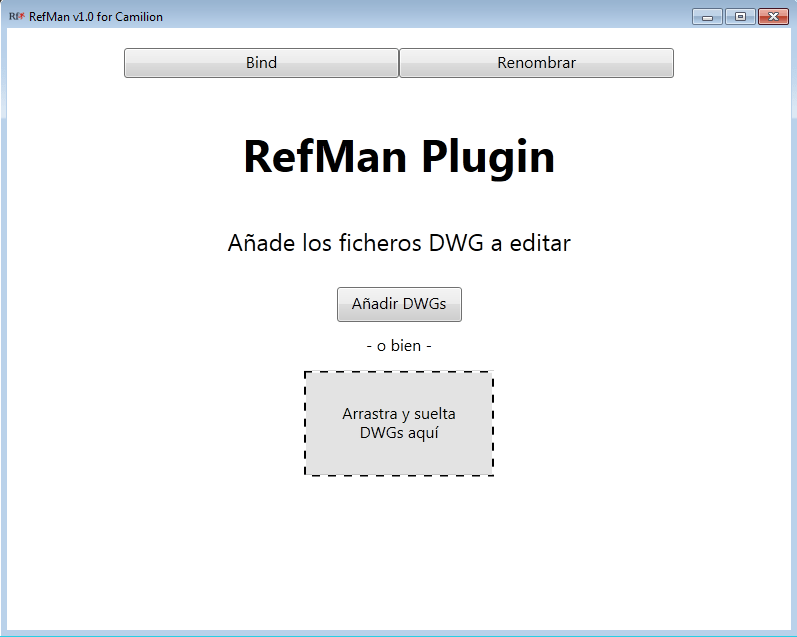
In this window we add the hundred files of the project that includes the delivery and select “ Bind ”.
Once the files are loaded, a new window appears with two listings, one on the left and the other on the right. The one on the left corresponds to the loaded files – during the whole process you can add new files without having to start everything from scratch. In the list on the right, there is a column (column “X”) that marks, with a color signal, the state of the reference (a kind of “traffic light”). This indicates in green that the reference is fine (the reference route is well specified) and in red that there is a problem with the reference (there are problems with the reference route).
At this point we confirm that the reference paths of all files are fine.
For the Bind option, there are three more columns. The first two (“Bind” / “Delete”) are basically to select some actions that can be executed by reference and the “Reference” column indicates the name of each of the loaded references.
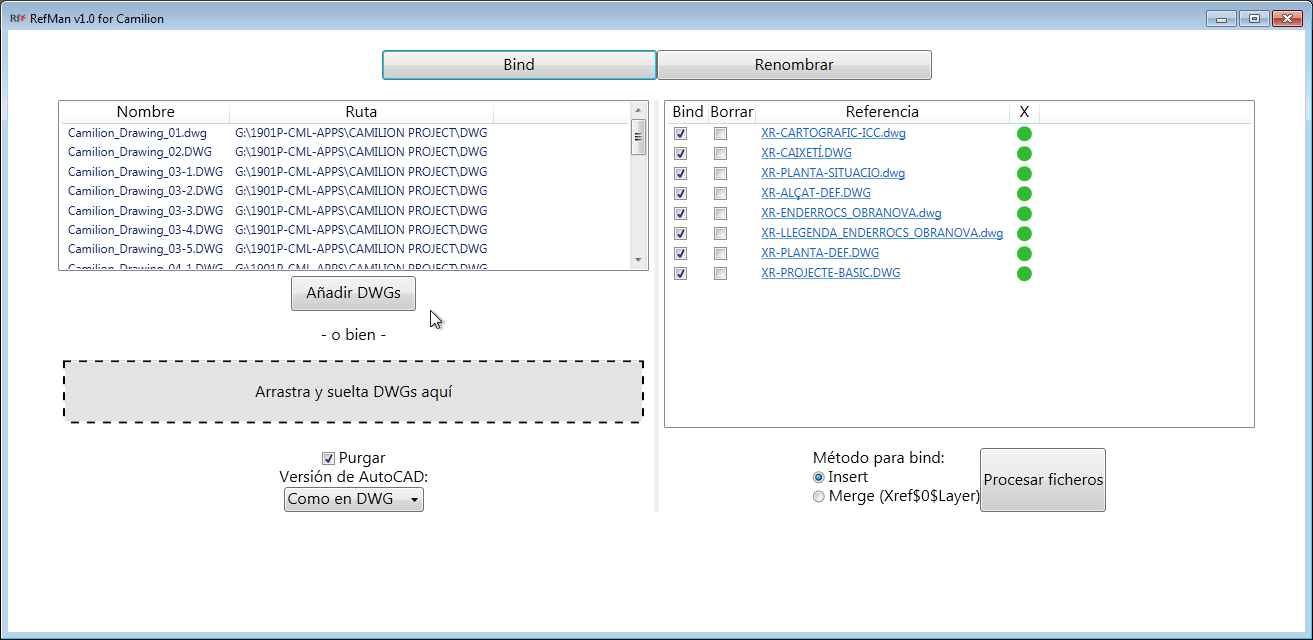
Once confirmed that all references are well (green signal) – otherwise, change to the option Rename , and confirm what the problem may be and correct it – and that they are all selected column “Bind”, I indicate What method of Bind is to be performed (Insert or Merge).
Once this is done, click on the “Process files” button.
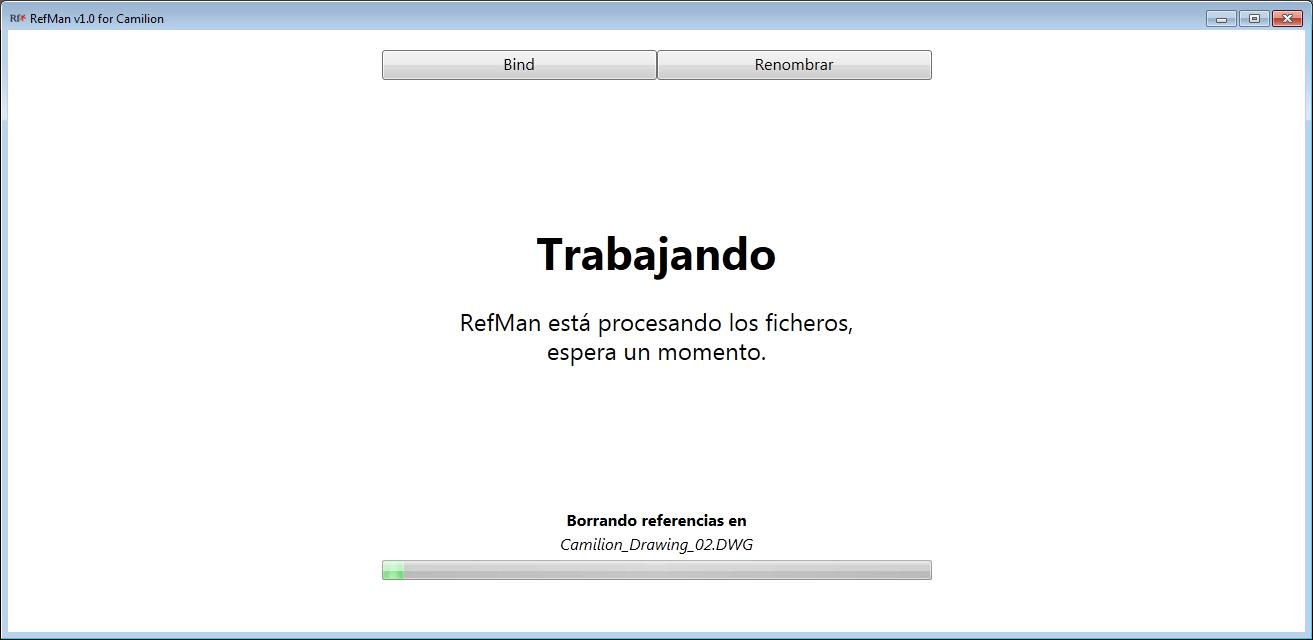
As you can see, this whole process is carried out very quickly and easily that would otherwise require a great effort and attention.
RefMan utility to change references that have been modified because of new versions
We have a project mounted on a hundred files and these in turn have a significant number of associated references. In determining point, the client indicates that a large part of the references have been modified and, in order to avoid confusion with the previous ones, he decided to change the name of all those that were updated.
As it is a large project, doing this in a conventional manner would require a lot of time, since the files must be opened and modified one by one.
Thanks to Camilion’s Apps RefMan , we can upload the files in the same sale and tell you to update all the names of the references that have changed.
To use it, you must open any file in AutoCAD and type the REFMAN command. A window will open asking to add the DWG files that you want to analyze.
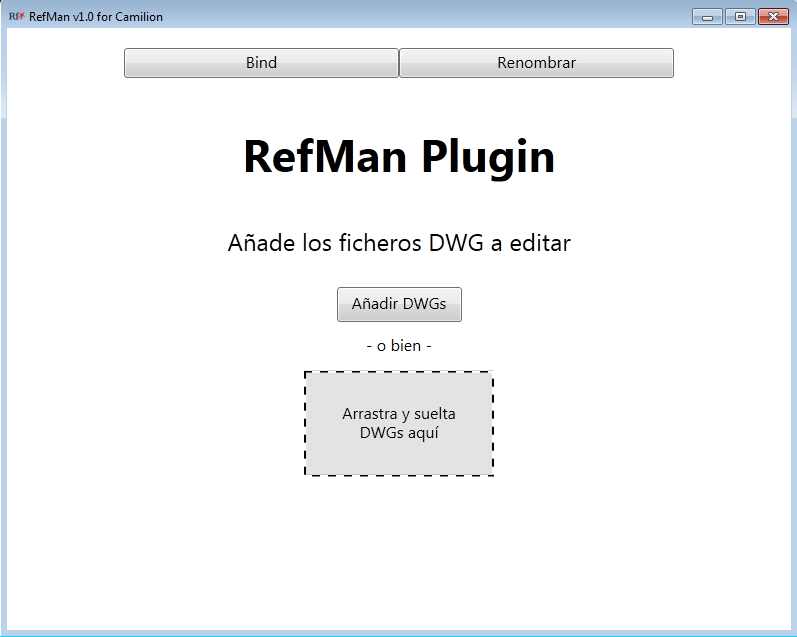
In this window we add the hundred files of the project that includes the delivery and select “ Rename ”.
As the new references changed their name, column “X” shows us an alert in red to warn us that it does not get any of the references.
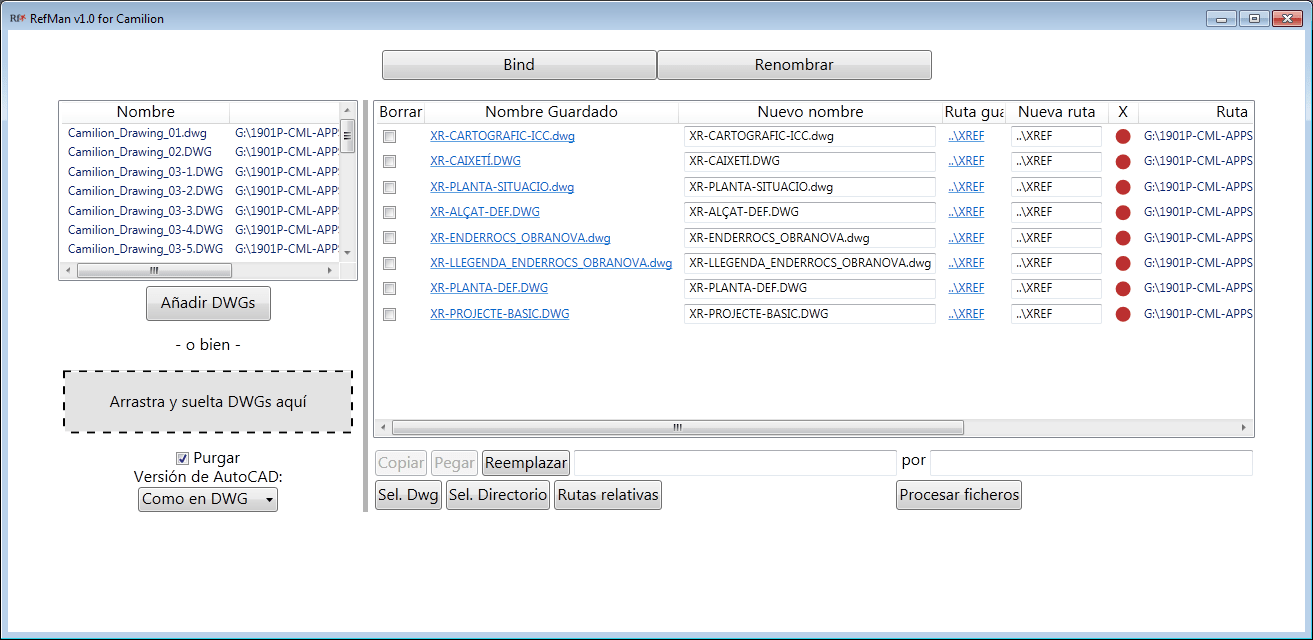
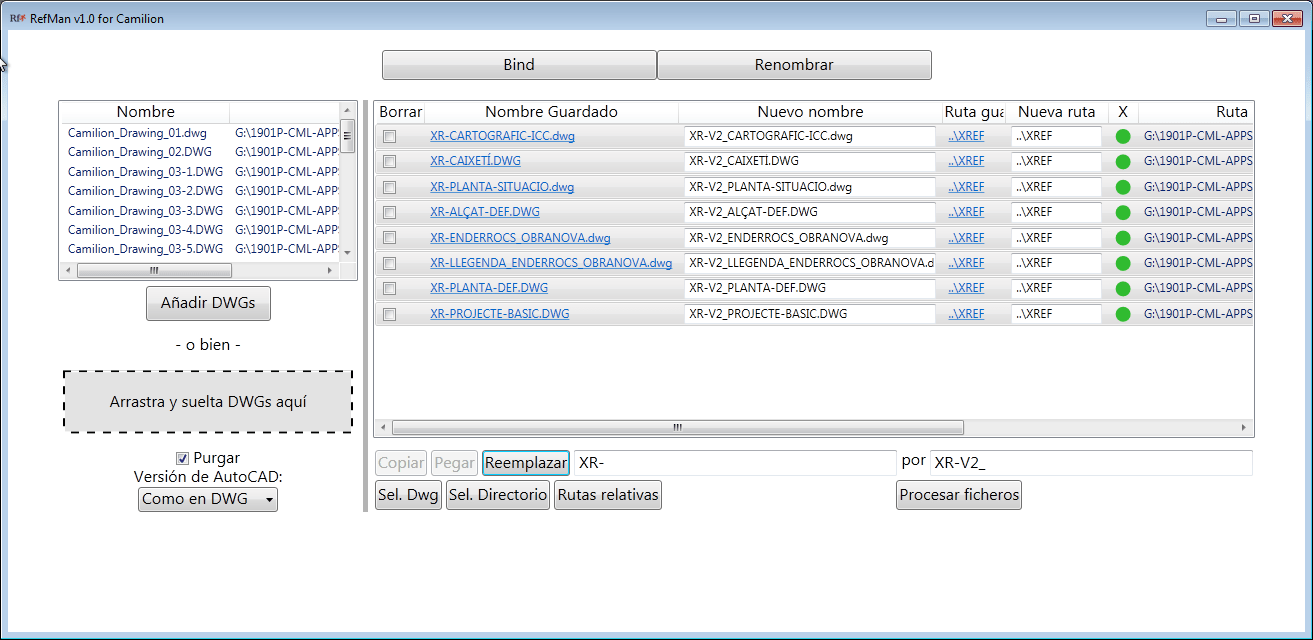
Once this is done, the “Process files” button must be clicked and the application will execute, permanently, all the changes made, modifying each of the files.
RefMan saves a backup file (.RefManBak) in the same folder you are working on, before modifying the files. If you need, for some reason, the backup version, you must delete the .RefManBak and place .dwg.
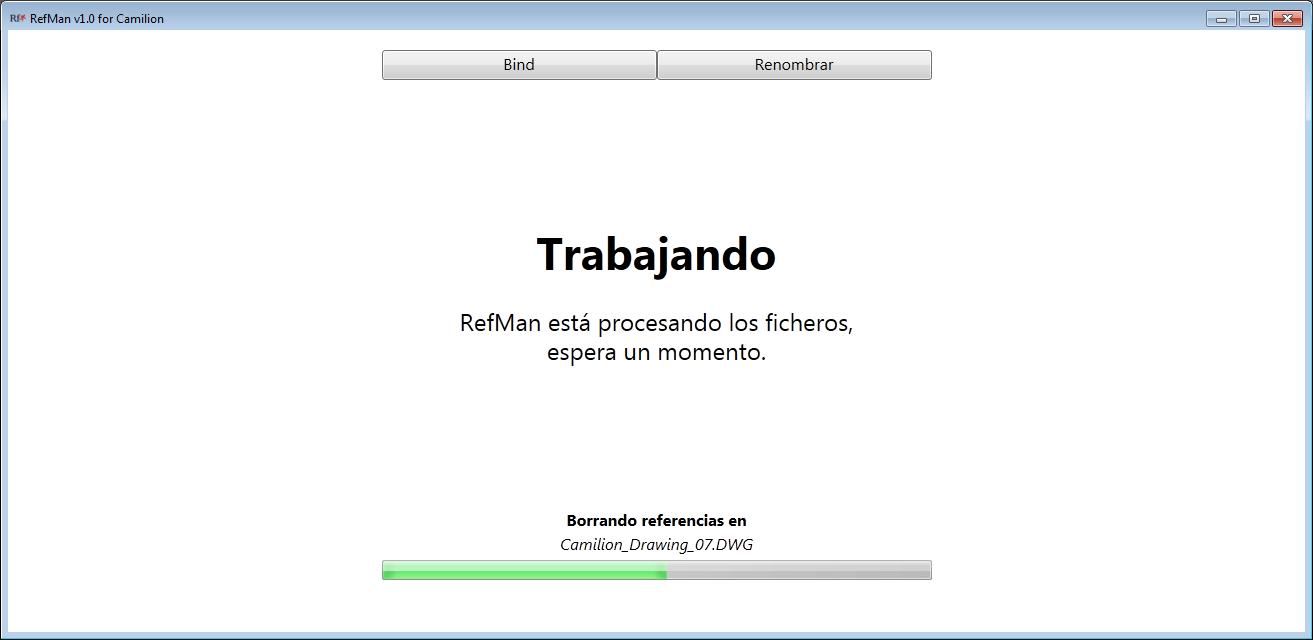
RefMan utility to verify that obsolete references are not being used
In the previous example we saw how you could update the names of the references directly from RefMan. In this example, show how you can verify that there is no old or outdated reference within a group of files and how to remove it.
Thanks to the Apps RefMan , from Camilion, we can upload all the files in the same sale and see the name of the references to confirm that they are all good and if there are any that are not, delete it and the application is responsible for deleting it directly from the file to which it was associated.
To use it, you must open any file in AutoCAD and type the REFMAN command. A window will open asking to add the DWG files that you want to analyze.
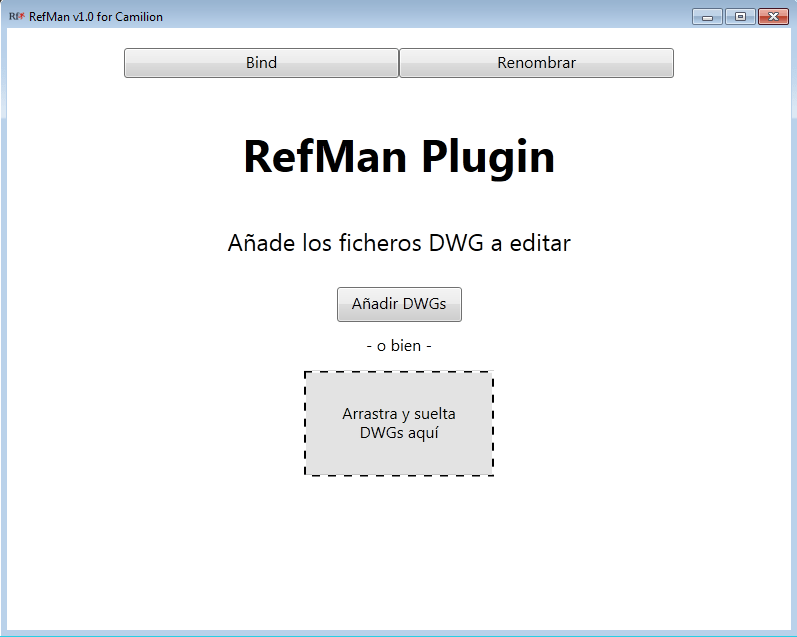
In this window we add the hundred files that encompass the project that we have been working on and select Rename .
In the Rename option, seven more columns appear describing names, paths and directories where the references and the actions that can be executed in each of these are found. We look in the “Saved Name” column for the name of the reference that should not go.
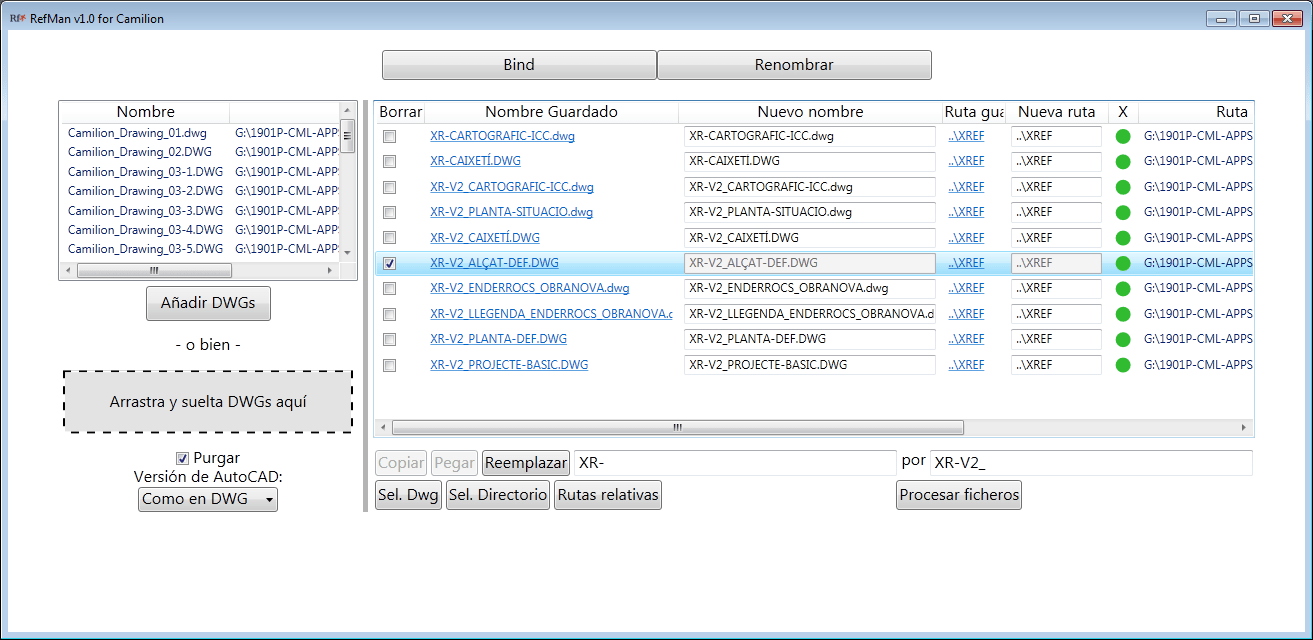
Once we get it, we select it in the “Delete” column and click on the “Process files” button and the application will permanently execute all the changes made, deleting the selected reference of all the files where it was hosted.
RefMan saves a backup file (.RefManBak) in the same folder you are working on, before modifying the files. If you need, for some reason, the backup version, you must delete the .RefManBak and place .dwg.
