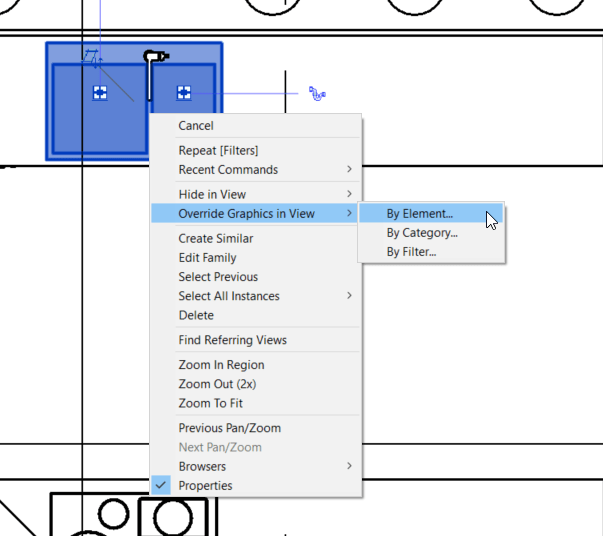
Remember the last time you selected a bunch of elements, right-clicked and chose Override Graphics in View > By Element?
Well… except for very specific exceptions, that kind of override should be your last resource (shame on you).
It’s much better to use filters to create graphical overrides on views for the power and flexibility they allow you to leverage. So, what exactly are filters and how can you apply them to work better and go home earlier? Read on…
What are Filters
Filters are Revit’s way to create intelligent selections of objects in order to control their visibility and overrides easily. When you create a filter, you define a series of rules or criteria, and only the objects that meet those criteria will be affected by the filter.
The Newbie way to create visual overrides:
Practical use cases
Filters are very useful when there is a clear criteria that elements can be grouped by.
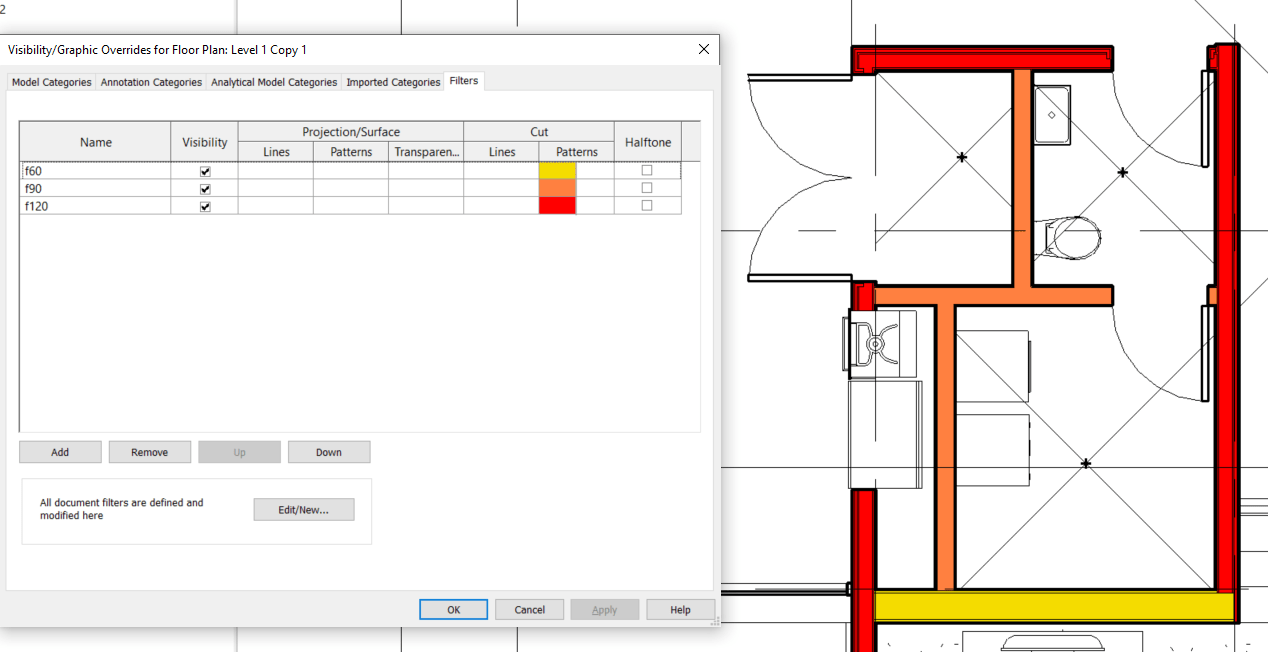
A classical example is colouring the walls in a plan view according to their fire rating category.
Another example may be hiding all steel frames that have an IPE section (or the opposite, showing only those with an IPE section).
There are practically endless possibilities to create efficient filters using this tool. Now, we’re going to see how we can create and apply a filter to our views.
Using filters
This process is divided into two steps: first we create the filter, then we apply the filter to the views.
Creating the filter
In this example, will be creating a filter based on the fire rating of our walls.
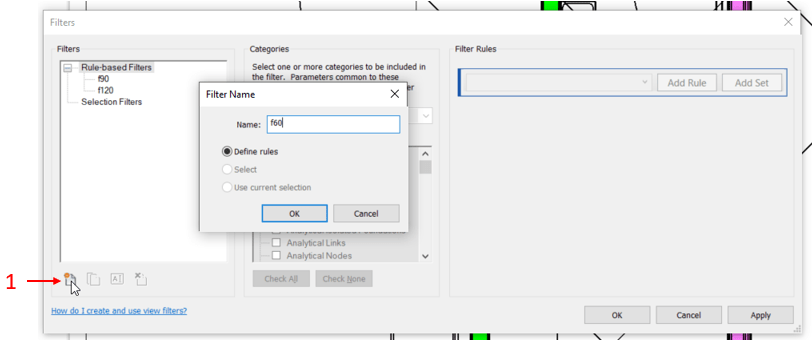
To create a filter, go to View > Graphics > Filters. This will open the Filters dialog, where we will create and manage all of our filters.
For the purpose of this blog post, we will be creating a Rule-based Filter, which is the most used type of filter. The steps to create the filter are:
- Click on the
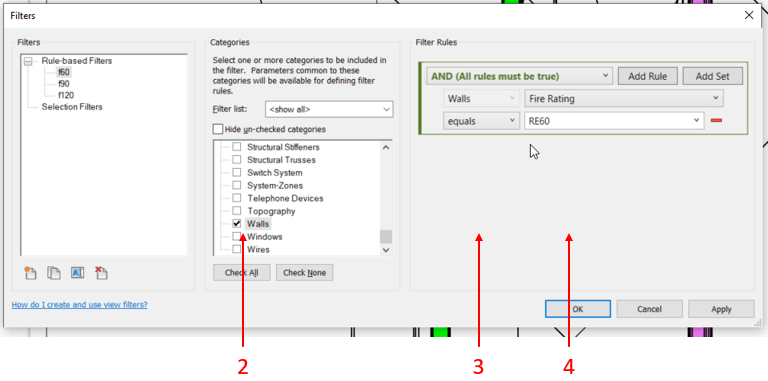
newicon, in the lower left corner of the dialog and give your new filter a name (ours is f60). - Select all categories that you want the filter to affect. In our case we will select only
Walls. - Set up as many rules as you like. For this example, we want the filter to select all the walls that have the text RE60 in the Fire Rating parameter (this is a Revit built-in type parameter).
- Click
OKto exit the dialog.
Please note that it’s possible to set multiple conditions by clicking on the
Add Rulebutton in the upper right corner. If there are multiple rules, the user can choose if all of them must be true (using theANDconditional) or if at least one must be true (using theORconditional).
Intermezzo: setting-up the parameters
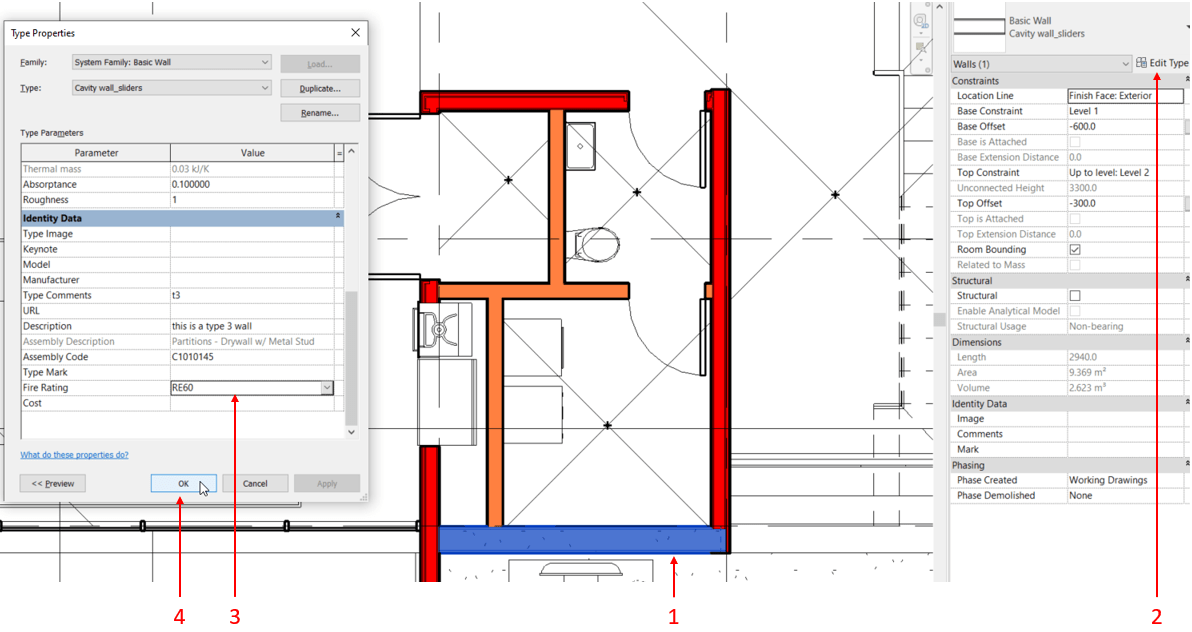
To ensure that we can override our views, our elements must have their parameters correctly assigned. For our example, we have to assign a fire rating to our walls, so we:
- Select one of our walls.
- Click on the
Edit Typebutton. - Scroll down to the
Fire Ratingparameter, and assign it a RE60 value (remember that this change will affect all the instances that belong to that wall type, because we’re editing a type property, so you’ll only need to do this once per type). - Click on
OKto apply the changes.
Applying the filter
Now that our filter has been created and our elements have their parameters assigned, it’s time to apply the filter to all the views we need to override.
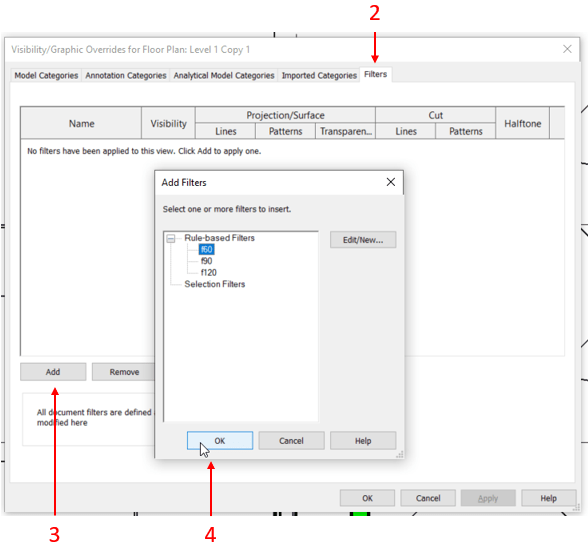
- Go to the view you wish to override and access it’s Visibility/Graphic Overrides dialog by pressing the shortcut
VG(or by navigating toView>Graphics>Visibility/Graphics). - Click on the
Filterstab. - Click on the
Addbutton. - Select our previously created filter and click
OK. - The filter now appears in the list and you can override any of its colours or turn off its visibility.
In this example, we added 2 more filters for walls with a RE90 and RE120 fire rating. We then changed the colour of the cut patterns and voilà! Our walls are automatically being coloured based on the conditions we defined previously.
The fun thing now, is that you can tweak the filters in any way to adapt to new project requirements and you may even use them in view templates to consistently override view elements according to your needs in a very precise and efficient manner.
Creating legends automatically
Now that all your graphic overrides are nicely controlled by view filters, wouldn’t it be nice to be able to create automatic legend views to visualize all this data consistently? At Camilion we have developed a plugin that does just that: LeGen.
Conclusion
Creating and applying filters is a very efficient way to manage visual overrides in Revit projects. Filters can be used to optimize the production of project documentation or help drafters with visualization issues.
This is a must-know workflow no matter the size of your project and it will bring enormous benefits to your company’s workflows.
To further automate your workflow, check out our Legend Generator plugin to create automatic legend views from the data in your view filters.
