LeGen |
Plugin for Revit
LeGen automatically creates a Legend view in Revit® using the colors (and data) from the filters applied on a view.
From €65

LeGen’s main functions

Set up your customised plan
Do you need a customised solution?
Count on us for a customised solution that perfectly fits your needs.
How to use LeGen
Other products that work with LeGen
Save more than 90% of the time with LeGen
Unlock a world of efficiency with Camilion and Save time. Click to revolutionize your workflow now!
Documentation
What is LeGen, a Revit legend from filter Plugin
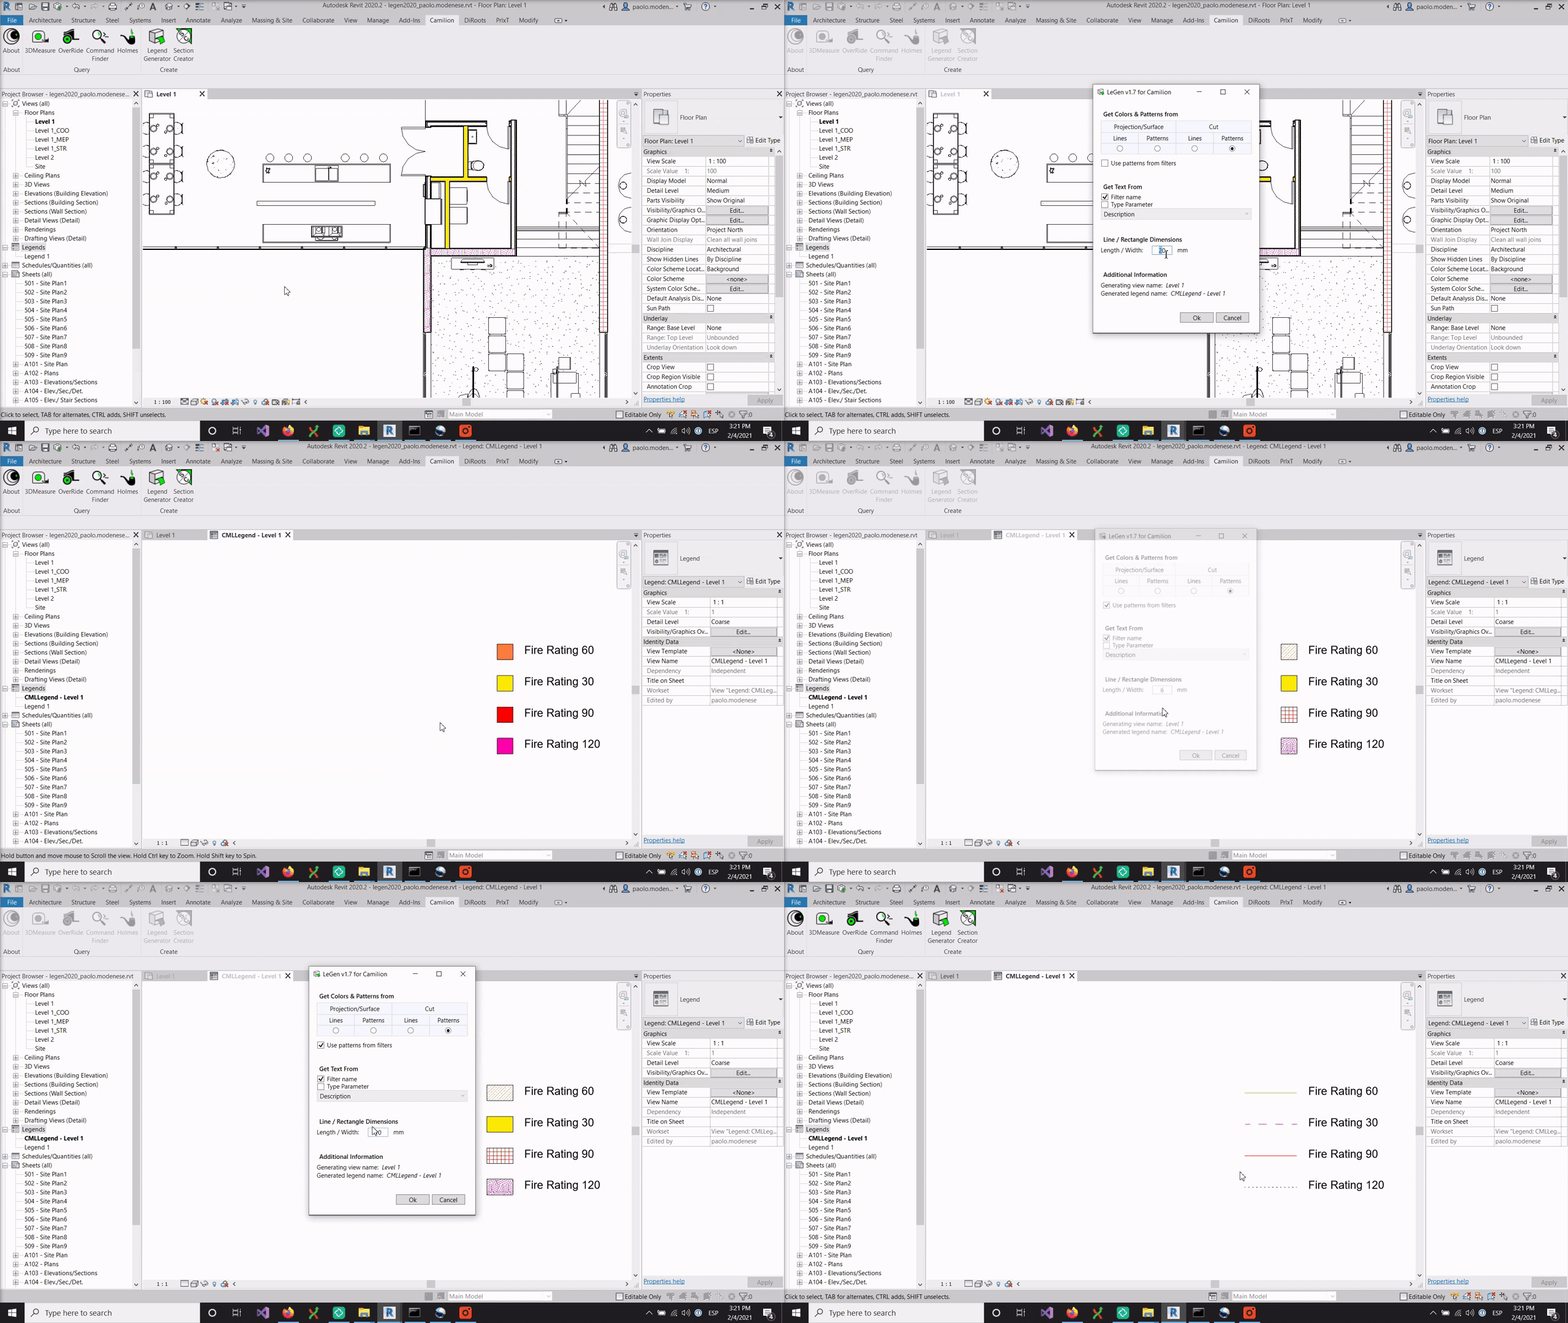
LeGen is a Legend Generator that automatically creates a legend view using the filter overrides you have applied on a view.
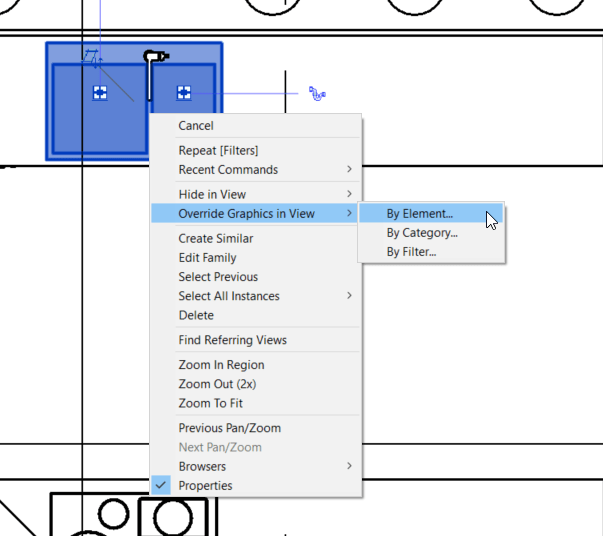
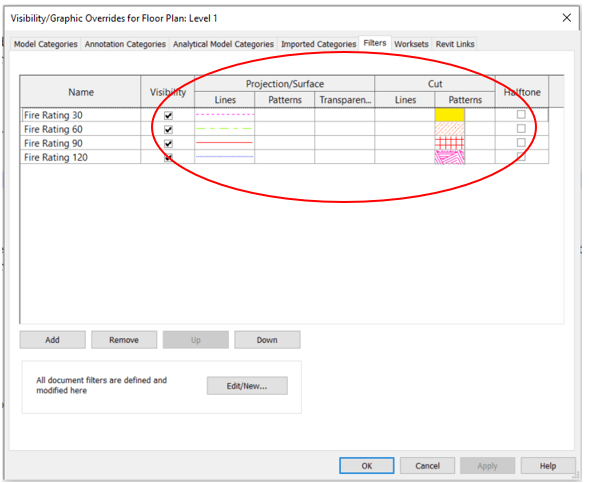
For a detailed tutorial in using filters to control graphic overrides, check out our other blog post. For the command to work, the only requisite is that your view has at least one filter set up, since this is where LeGen gets the data to populate the legend.
Let’s explore each option in detail.
Compatibility
Currently, LeGen is compatible with:
- Autodesk® Revit® versions 2018 to 2026
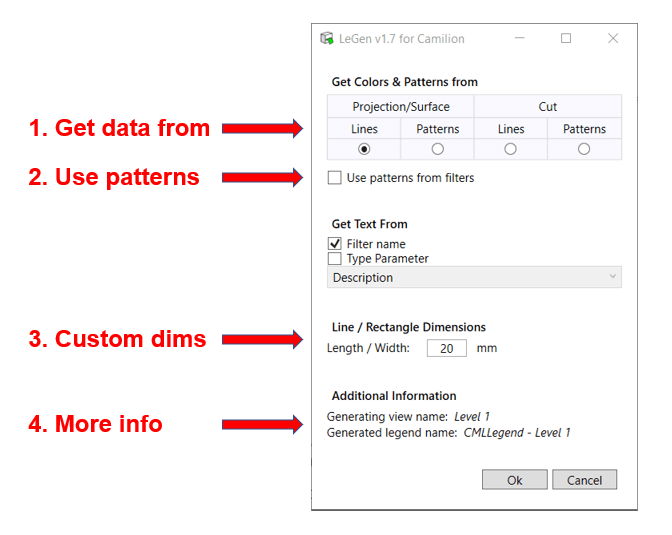
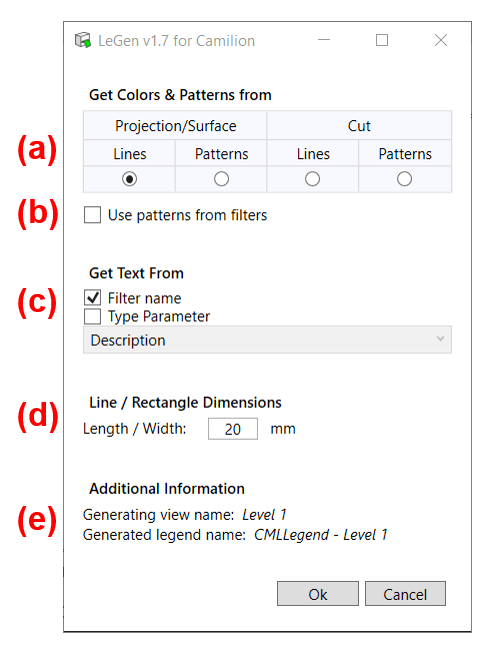
Get Colors & Patterns From (a)
In section (a) we find 4 radio-buttons that correspond to 4 possible options of where to get your Revit data from. You can choose to get it from:
- Projection Lines
- Surface Patterns
- Cut Lines
- Cut Patterns
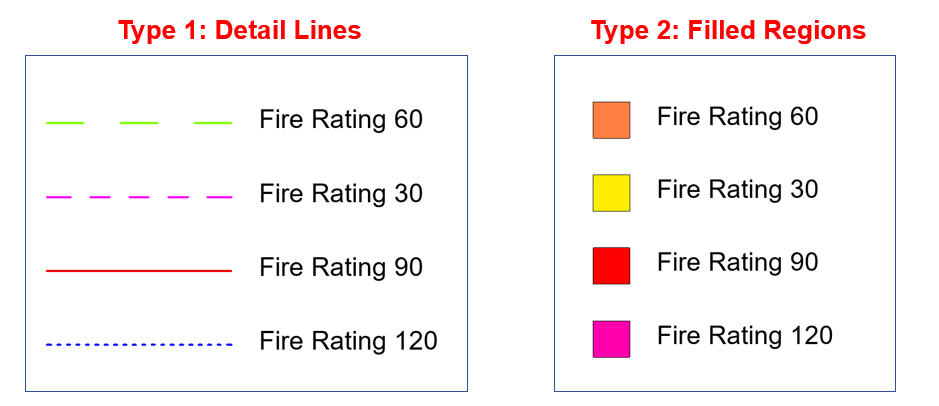
Choosing one of the Lines options will result in a legend where each entry is represented by a Detail Line (Type 1). Choosing one of the Patterns will result in a legend where each entry is represented by a Fill Region (Type 2).
Use patterns from filters (b)
If the checkbox is enabled, the detail lines or filled regions created will have their pattern overridden to match the pattern chosen in the filter. If the checkbox is disabled, the detail lines or filled regions will have a solid pattern applied.

Get Text From (c)
This section allows you to choose where to get the text that will populate your legend:
- Filter name: The filter’s name will be used.
- Type Parameter: Enables a drop-down that allows you to choose from what parameter to draw the data to populate the legend.
Both options can be used simultaneously.
Line / Rectangle Dimensions (d)
A textbox allows you to input the length of the lines or rectangles used in the legend. The measurement is in millimetres.
Changing the size of the legend
To change the size of the legend, simply change the text’s height to whatever value suits your needs and re-run the LeGen plugin. You will see that the spacing between each of the entries will adjust automatically according to the text’s height.
Additional info (e)
Naming conventions
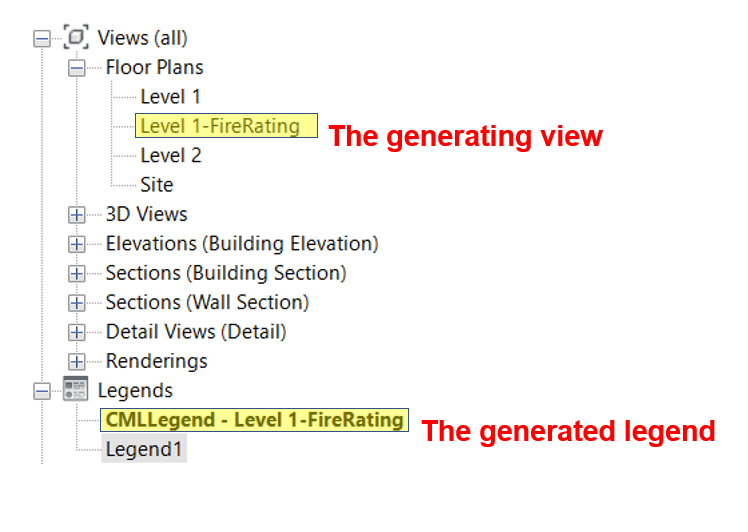
As you can see in section (e) of the first image, the generated legend’s view name will have the following format: Fixed prefix + generating view name.
It is recommended that you don’t change this name or the generating view name, in order to maintain a live relationship between the legend and the view so that you can automatically update the legend if required.
Pinned elements
All the elements in the legend are pinned. It is recommended that you don’t do any manual modification in this view, since updating the legend automatically will cause the loss of these changes. In any case, a Warning Dialog will display before updating the legend if LeGen finds that any element has been unpinned.
Types created
LeGen will create two family types needed for the legends’ creation:
- A Text Note type called CML.
- A Filled Region type called CML.
Additional info (e)
Naming conventions
As you can see in section (e) of the first image, the generated legend’s view name will have the following format: Fixed prefix + generating view name.
It is recommended that you don’t change this name or the generating view name, in order to maintain a live relationship between the legend and the view so that you can automatically update the legend if required.
Related content
Save more than 90% of the time with LeGen
Unlock a world of efficiency with Camilion and Save time. Click to revolutionize your workflow now!
